In the thrilling world of Monster Hunter Wilds, raw power isn't always the key to victory. Unmatched speed and strategic positioning can overcome even the toughest beasts. This is where the Dual Blades shine. Their lightning-fast attacks and versatile moveset make them a formidable weapon in the right hands. Let's explore the best ways to wield these deadly blades.
Recommended Videos Dual Blades in Monster Hunter Wilds
Rapid and deadly, the Dual Blades excel at delivering multiple hits in quick succession. Mastering both their standard and Demon/Archdemon modes is crucial for success in any hunt.
All Moves
| Command | Move | Description |
|---|---|---|
| Triangle/Y | Double Slash/Circle Slash | A fundamental combo starter. Press Triangle/Y for a Double Slash, then again for a Circle Slash. |
| Circle/B | Lunging Strike/Roundslash | A slashing attack that advances in the direction you're aiming. Press again for a Roundslash. |
| R2/RT | Demon Mode | Activates Demon Mode, boosting attack power, movement speed, evasion, and granting knockback immunity. |
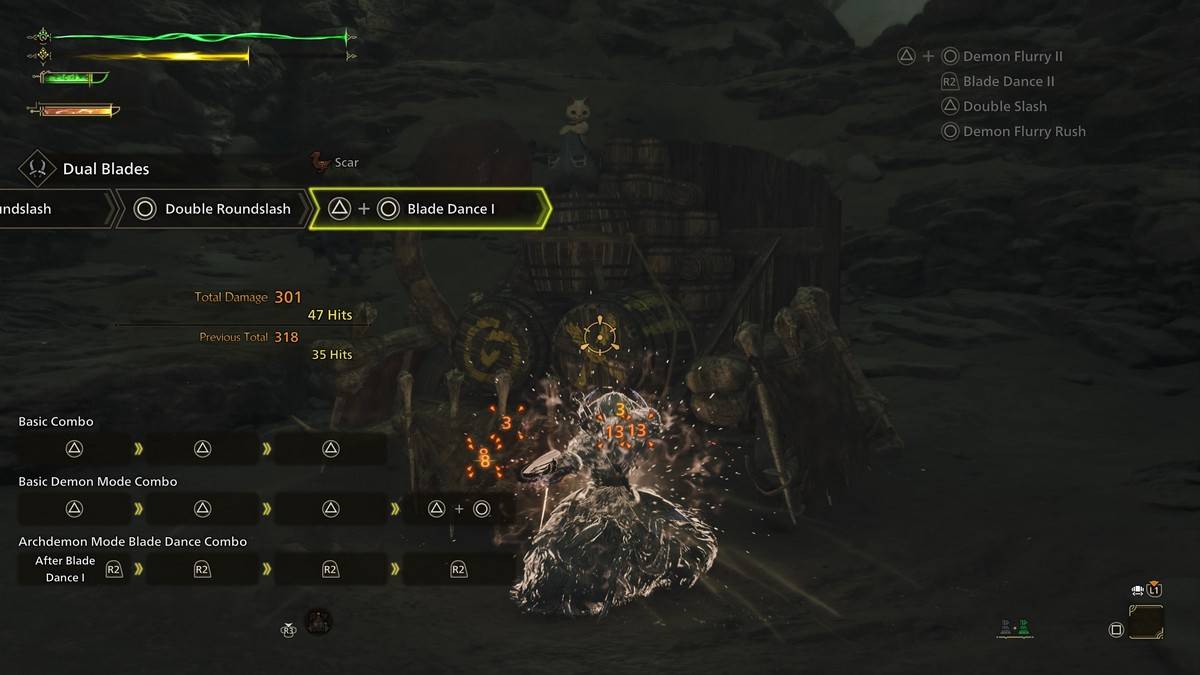
| Triangle/Y + Circle/B (In Demon Mode) | Blade Dance I, II, III | Powerful attacks in Demon Mode, chained together and consuming the Demon Gauge. |
| Triangle/Y + Circle/B (In Archdemon Mode) | Demon Flurry I, II | A series of attacks exclusive to Archdemon Mode, consuming the Demon Gauge. Use the analog stick to control direction. These can be chained with Blade Dance attacks using R2/RT. |
| Cross/A (During Demon/Archdemon Mode) | Demon Dodge | A faster dodge in Demon/Archdemon Mode. A Perfect Evade triggers a damage buff and allows attacks during the dodge. Demon Dodge doesn't consume the Demon Gauge in Demon Mode. |
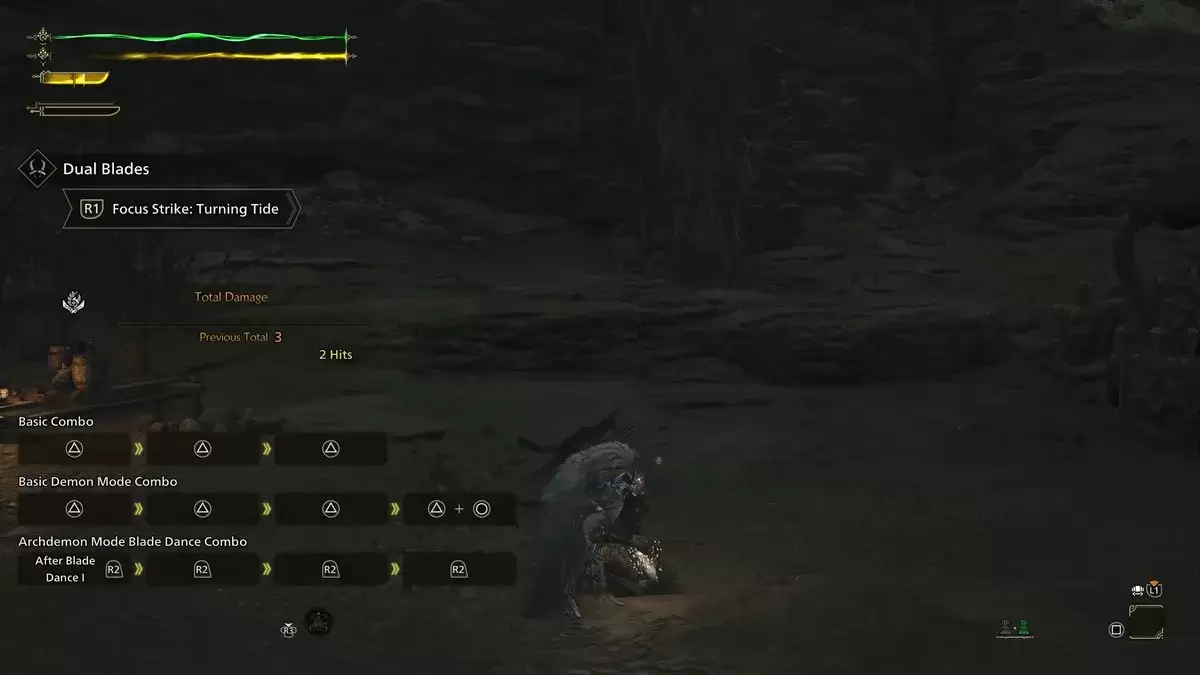
| L2/LT + R1/RB | Focus Strike: Turning Tide | A powerful slash effective against wounds. Hitting a wound triggers a Midair Spinning Blade Dance, potentially damaging multiple wounds. |
Demon Mode/Demon Gauge and Archdemon Mode
The Dual Blades feature a unique gauge mechanic. Demon Mode enhances your abilities but drains stamina. Landing attacks fills the Demon Gauge. A full gauge activates Archdemon Mode, granting even more powerful attacks but consuming the gauge over time. While mounted, the Demon Gauge stops decreasing.
Demon Dodge
A Perfect Evade activates Demon Dodge, increasing damage and allowing attacks while dodging for 12 seconds. Subsequent dodges during this time deal additional damage.
Combos
Dual Blades combos revolve around Demon and Archdemon Modes. Chaining attacks maximizes damage.
Basic Combo
Chain three Triangle/Y attacks (Double Slash, Double Slash Return Stroke, Circle Slash) for consistent damage.
Demon Mode Basic Combo
In Demon Mode, perform Demon Fangs, Twofold Demon Slash, Sixfold Demon Slash, finishing with Triangle/Y + Circle/B for Demon Flurry I.
Archdemon Mode Blade Dance Combo
In Archdemon Mode, start with Blade Dance (Triangle/Y + Circle/B), followed by four R2/RT presses for Demon Flurry I, Blade Dance II, Demon Flurry II, and Blade Dance III. This rapid sequence delivers devastating damage.
Related: How to Capture Monsters in Monster Hunter Wild
Dual Blade Tips
Mastering the Dual Blades involves seamlessly transitioning between modes for maximum impact.
Always Follow Up
Begin with the Demon Flurry Rush combo (Circle/B x3), then chain Triangle/Y + Circle/B three times to fill the Demon Gauge and unleash powerful attacks.
Keep Your Stamina Up
Demon Mode consumes stamina. Manage it by exiting Demon Mode to recover or using Focus Strike on wounds to fill the Demon Gauge without constant stamina drain.
Dodging in Between Attacks
Dodge frequently. Dual Blades' quick attacks allow for timely evasive maneuvers.
Ensure Sharpness
Frequent attacks dull your blades quickly. The Speed Sharpening skill is highly recommended.
This guide covers the essentials of mastering the Dual Blades in Monster Hunter Wilds. Check out The Escapist for more helpful guides.
Monster Hunter Wilds is available now on PlayStation, Xbox, and PC.