Conquer Zoma's Citadel in Dragon Quest 3 Remake: A Comprehensive Guide
This guide provides a complete walkthrough of Zoma's Citadel in Dragon Quest 3 Remake, the game's climactic final dungeon. It details the path to the citadel, strategies for each boss encounter, and the location of all treasure.
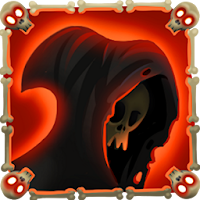
Reaching Zoma's Citadel
After defeating Baramos, you'll enter the darkened world of Alefgard. To reach Zoma's Citadel, you must obtain the Rainbow Drop by collecting:
- Sunstone (Tantegel Castle)
- Staff of Rain (Shrine of the Spirit)
- Sacred Amulet (Rubiss, after freeing her in the Tower of Rubiss – requires the Faerie Flute)
Combining these items creates the Rainbow Bridge, leading to the citadel.
Zoma's Citadel Walkthrough
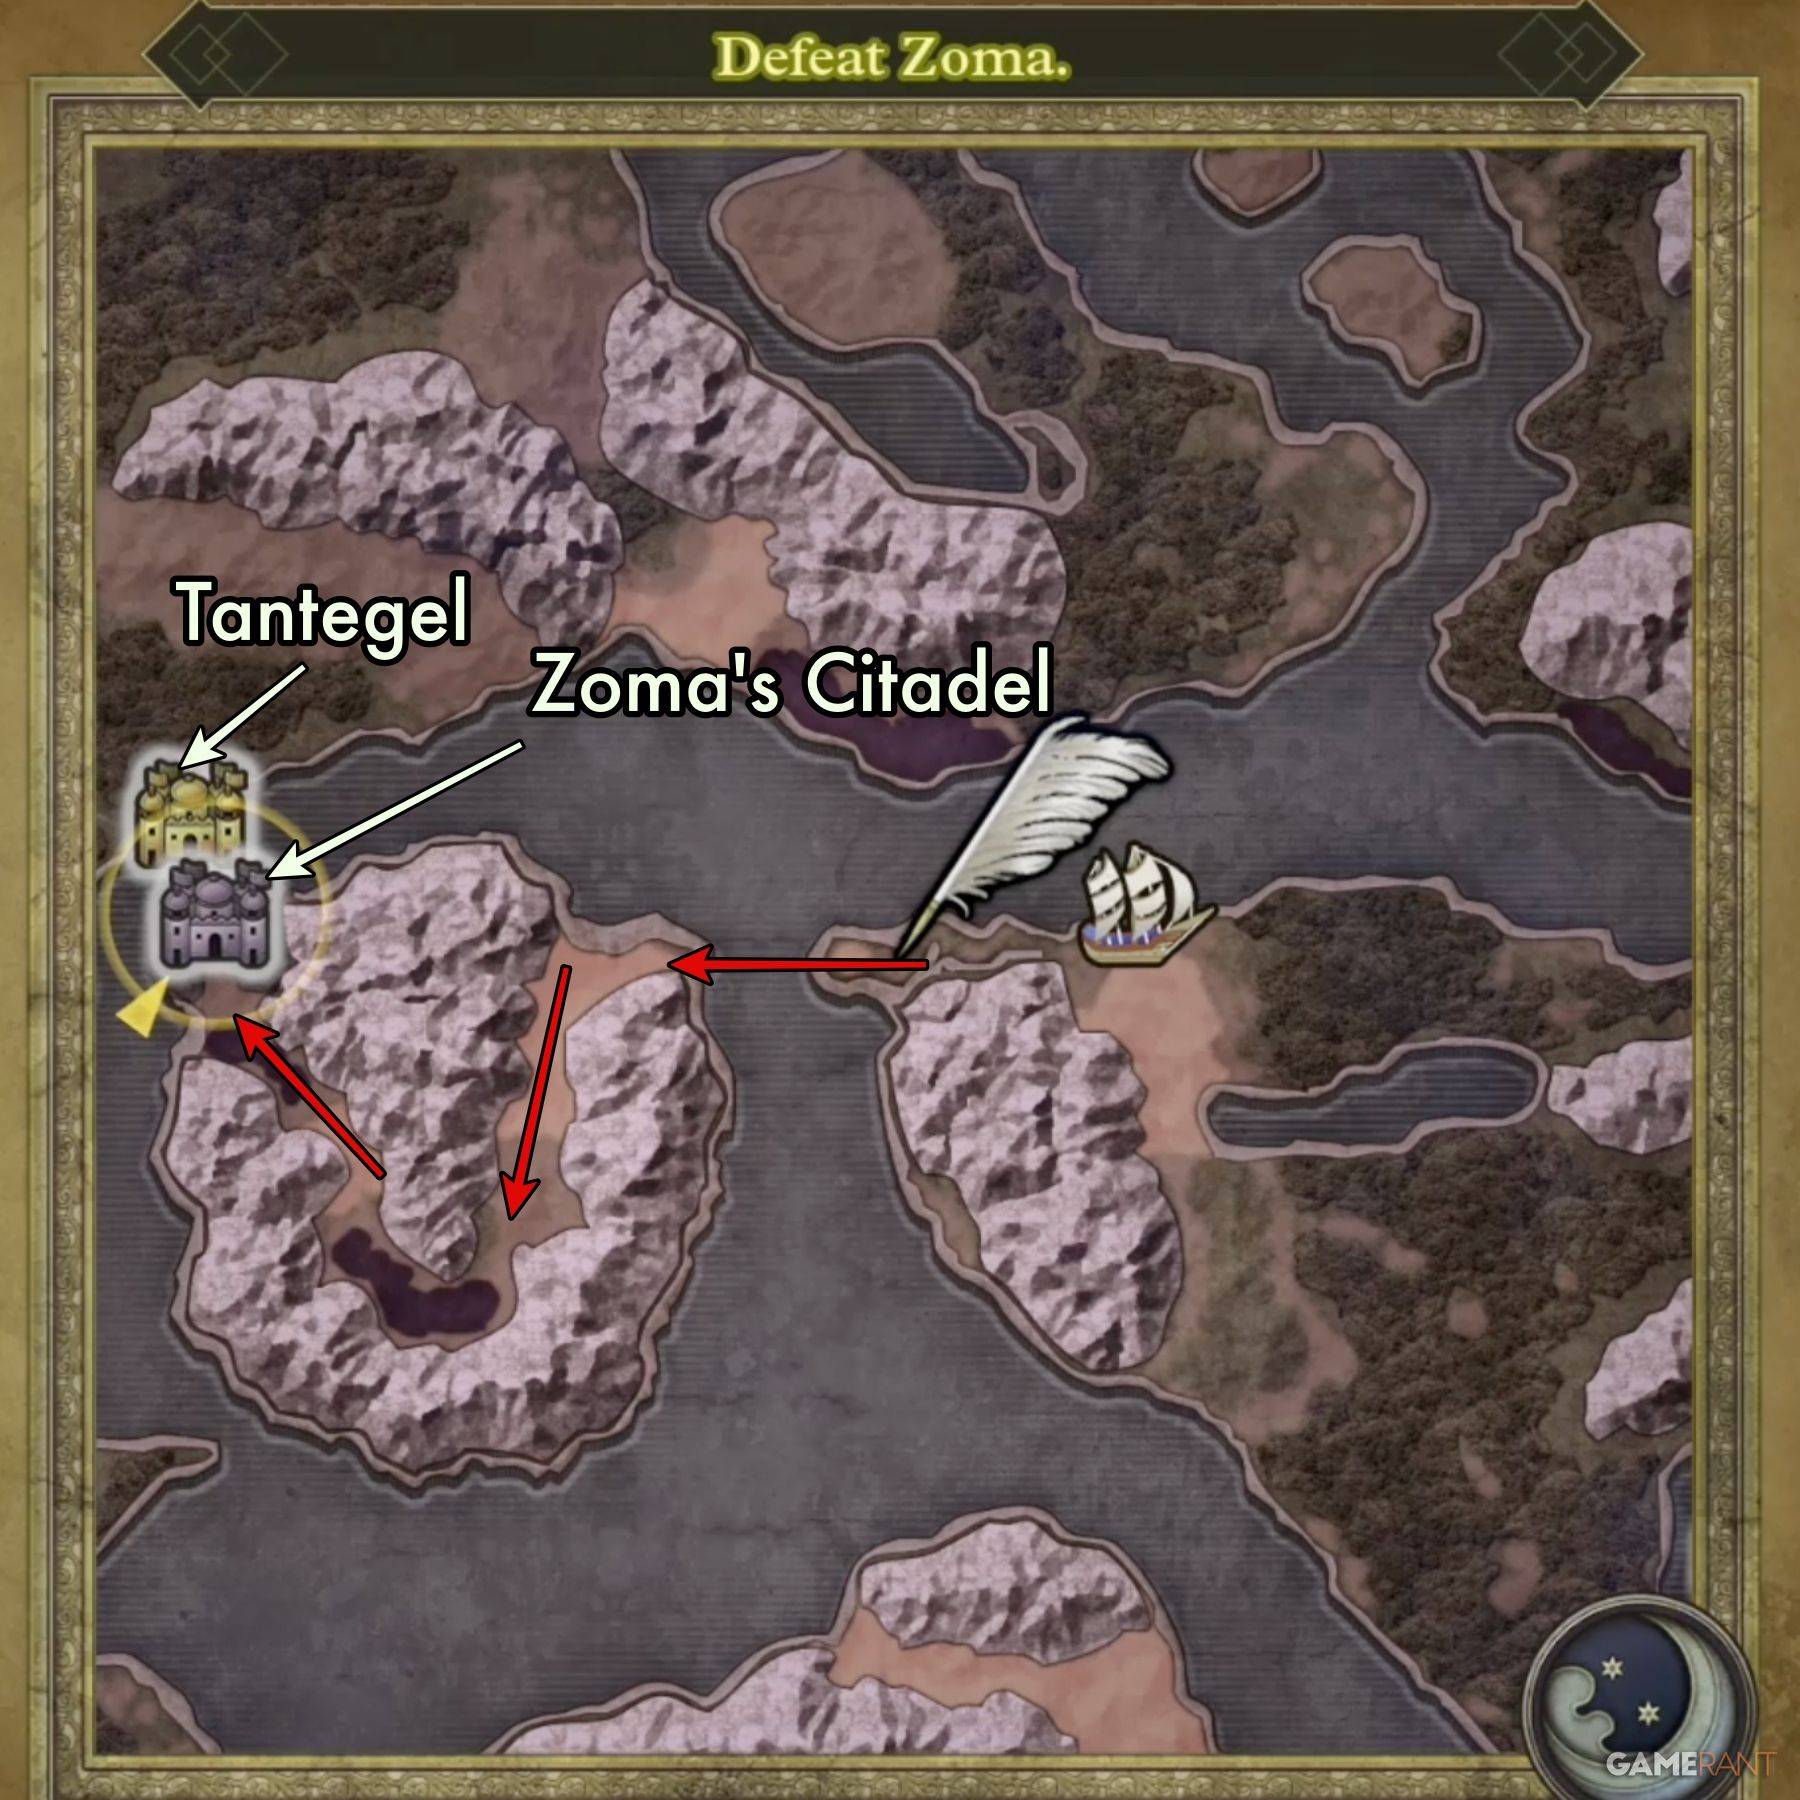
1F:
Navigate the first floor to the throne in the north. Activating it reveals a hidden passage. Explore side chambers for treasure:
- Mini Medal (buried behind throne)
- Seed of Magic (electrified panel)
Prepare for numerous Living Statues in the central chamber.
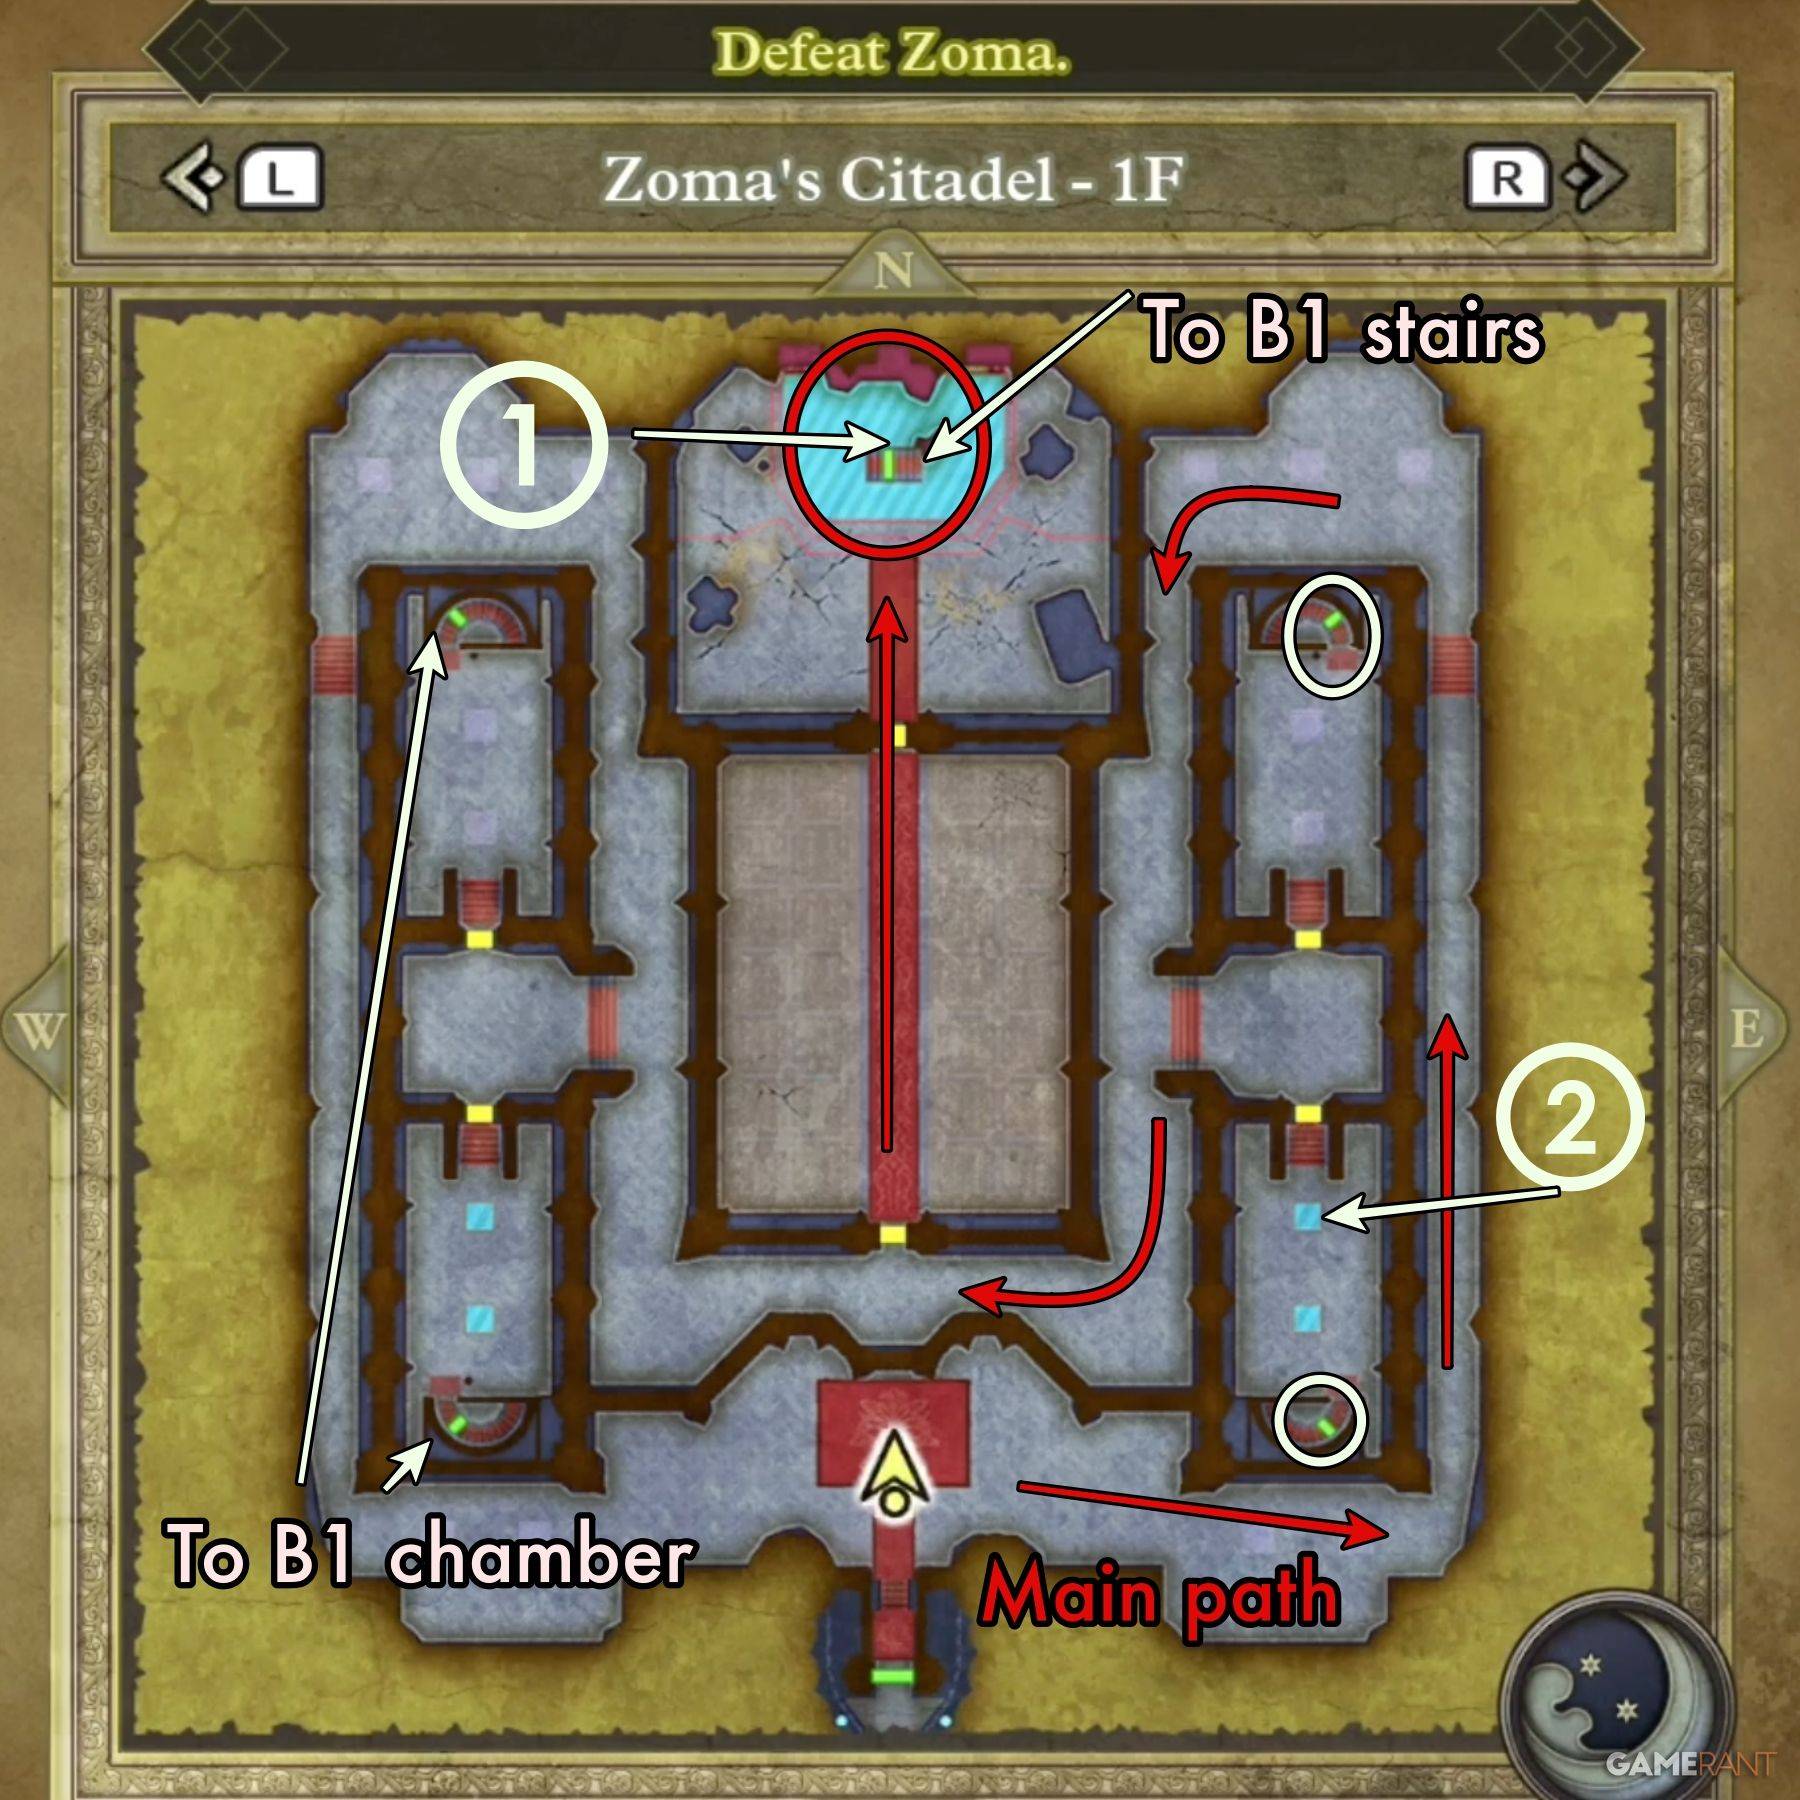
B1:
B1 contains a single chest with the Hapless Helm.
B2:
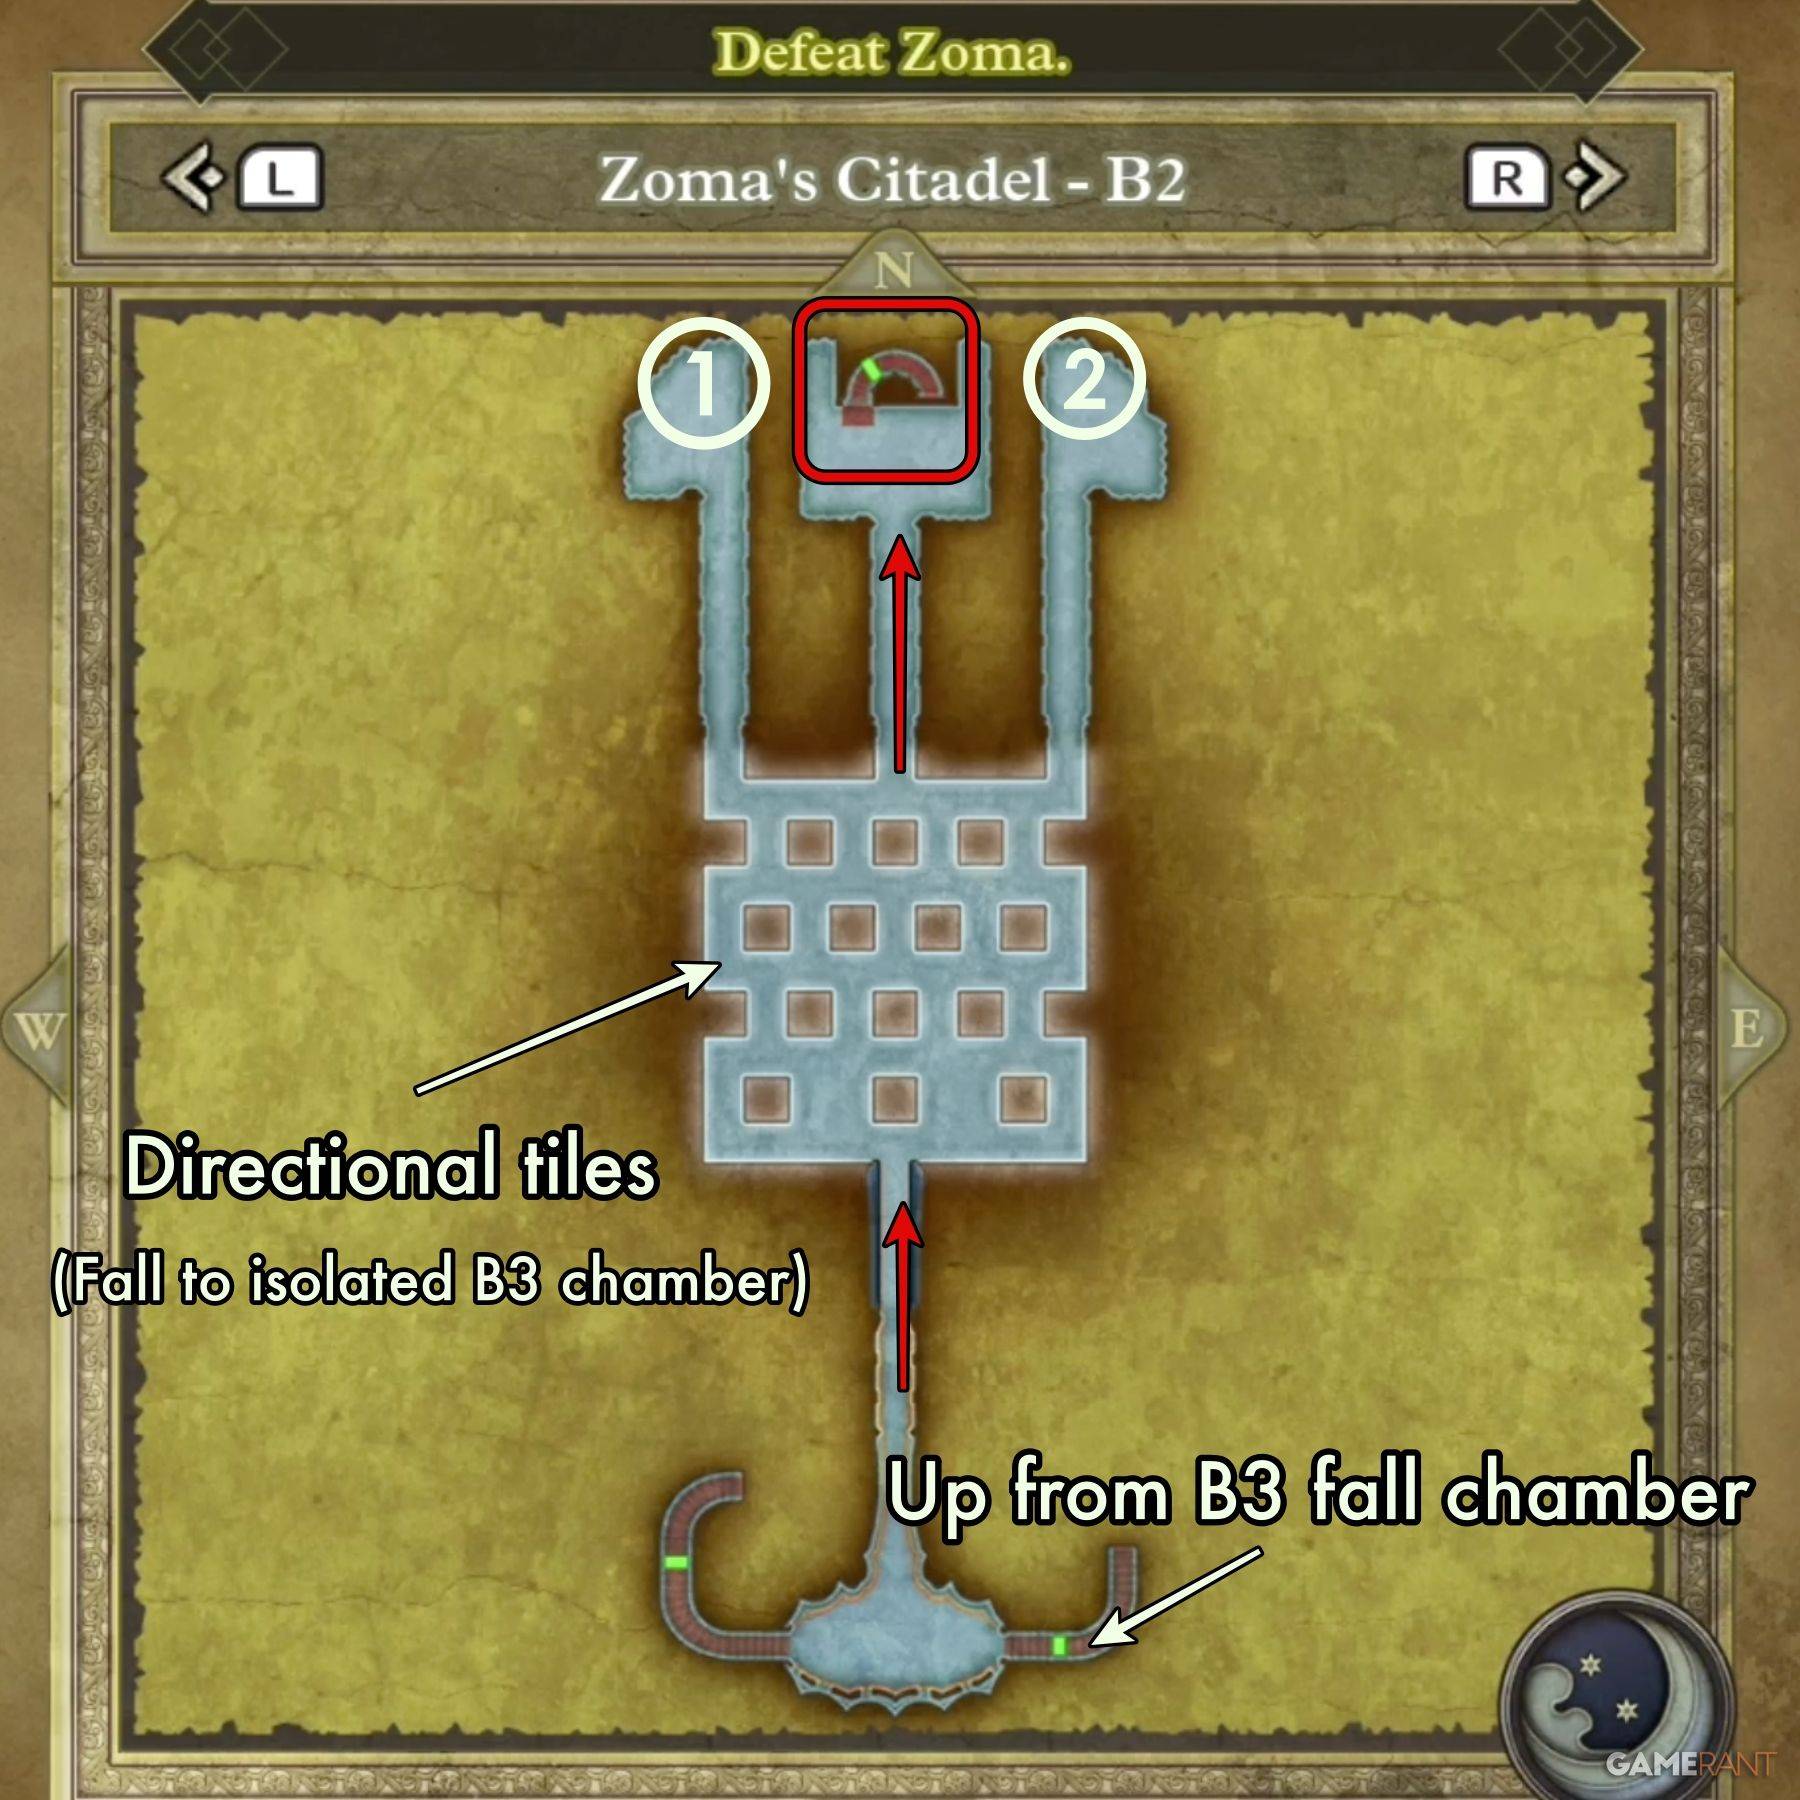
This floor features directional tiles. Practice using similar tiles in the Tower of Rubiss (3F, NW corner) if needed. The key is understanding the color-coded directional inputs. Blue/Orange halves correspond to North/South movement on the D-pad; the orange arrow indicates East/West movement (Up/Down on the D-pad).
Treasure:
- Scourge Whip
- 4,989 Gold Coins
B3:
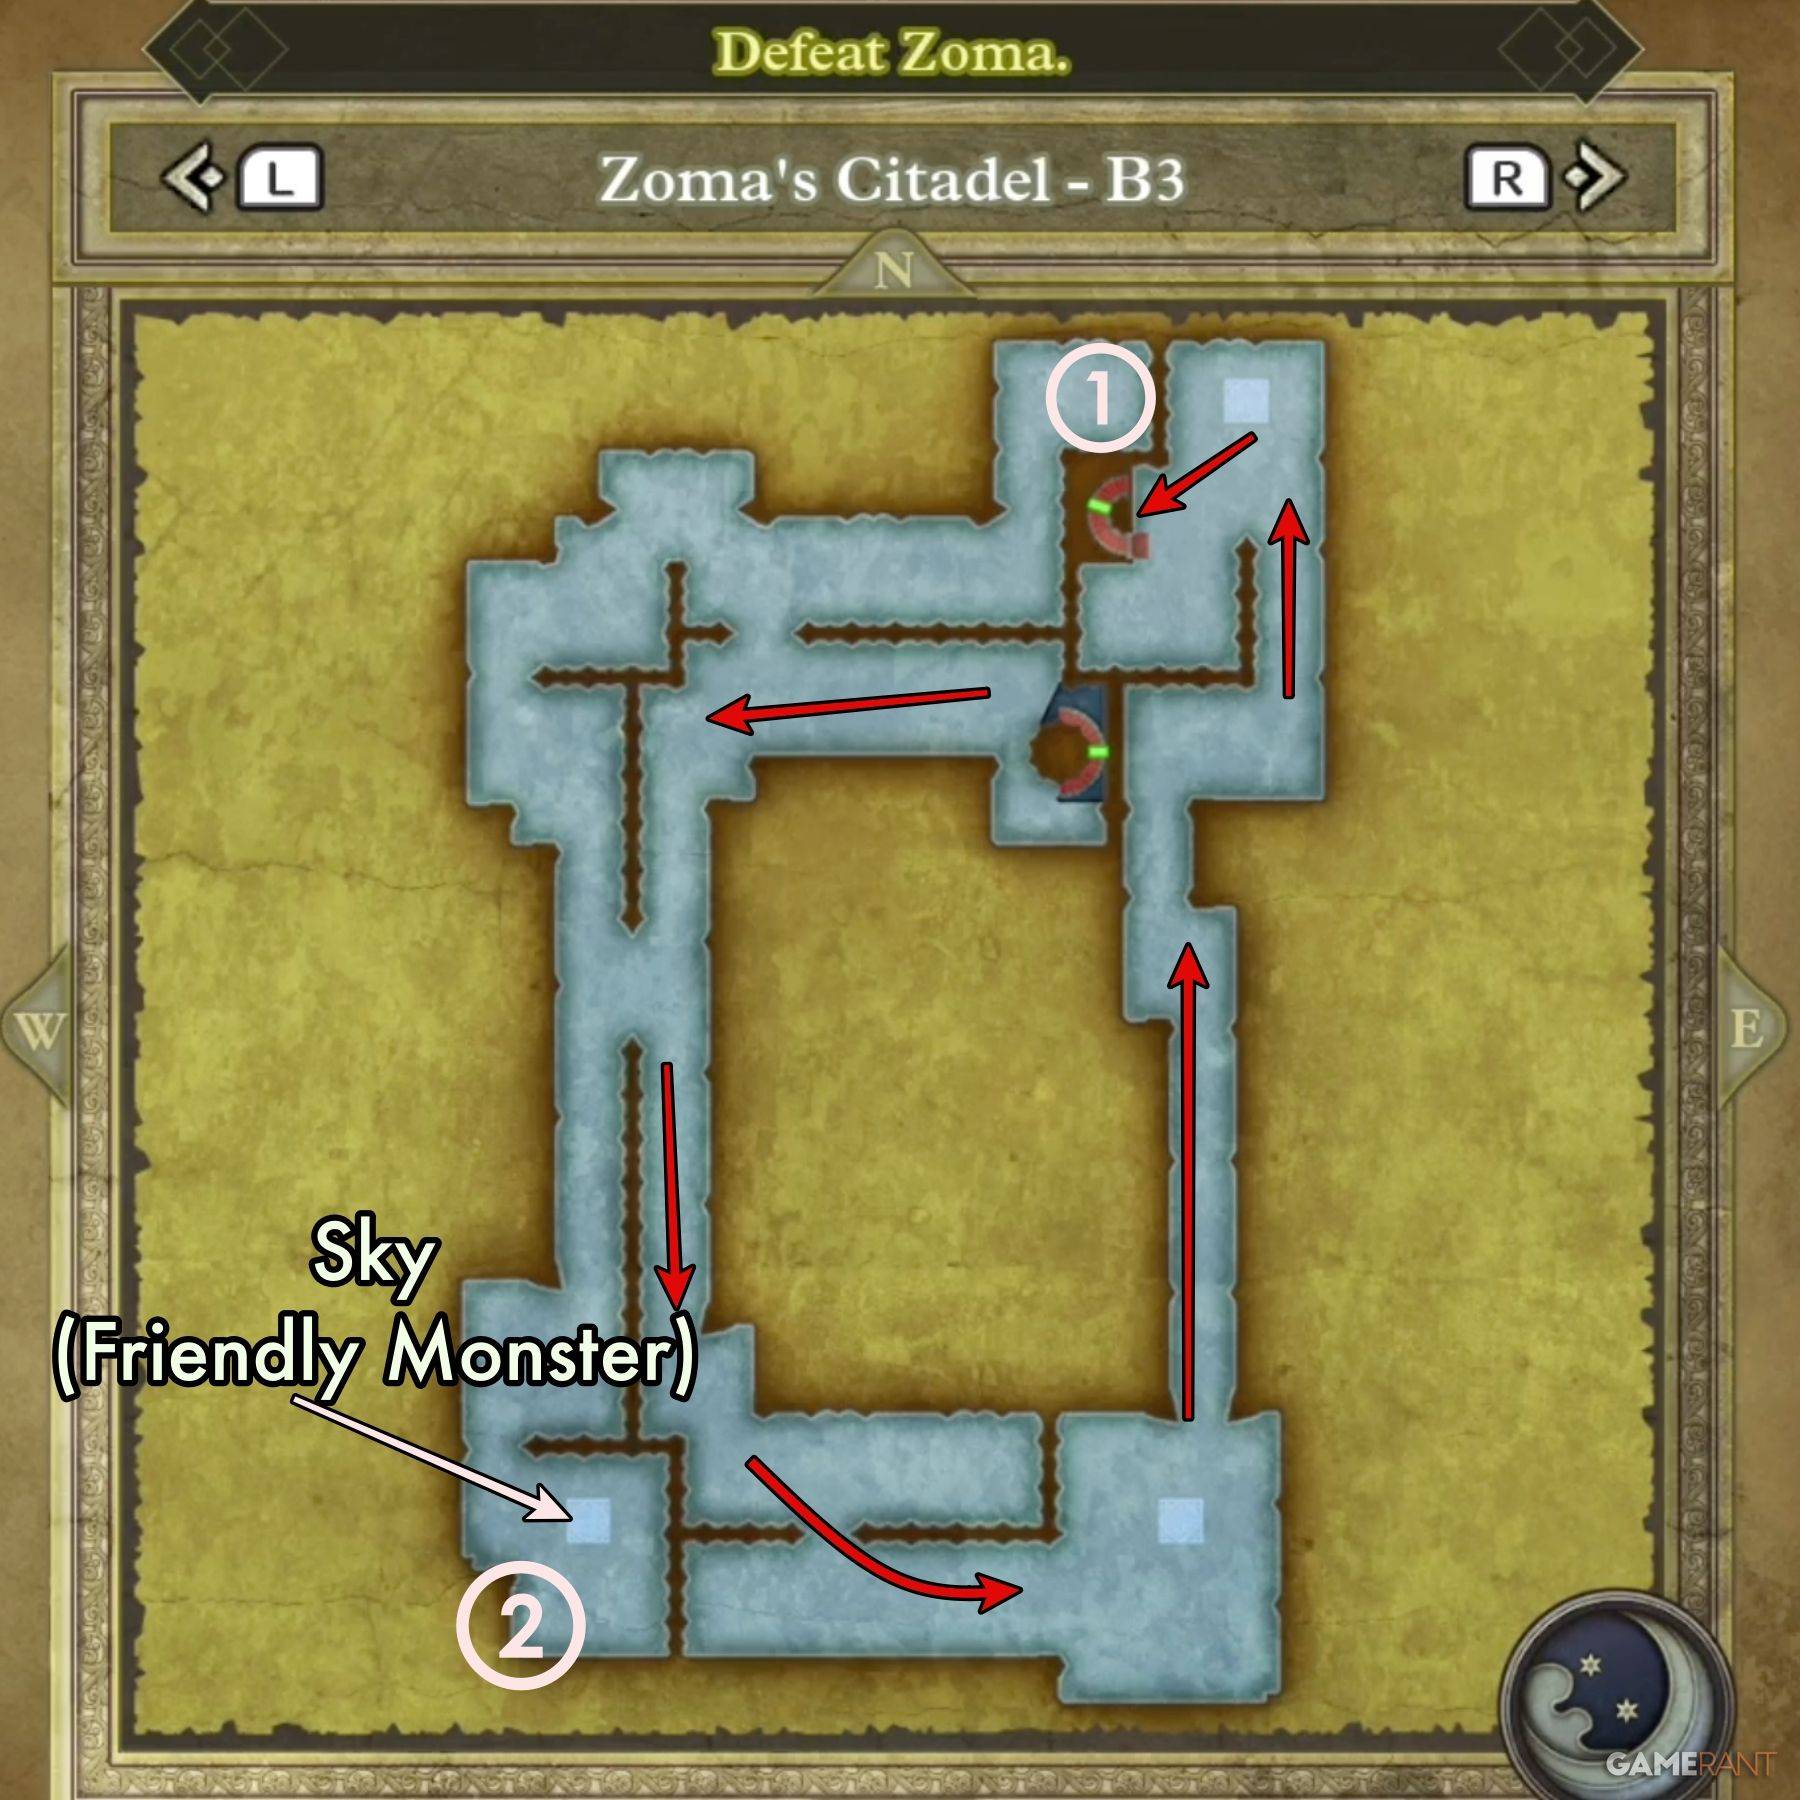
Follow the outer path. A detour to the southwest reveals Sky, a friendly Soaring Scourger. A separate isolated chamber (accessible via B2's holes) contains another friendly Liquid Metal Slime and a chest.
Treasure:
- Dragon Dojo Duds
- Double-Edged Sword
- Bastard Sword (Isolated Chamber)
B4:
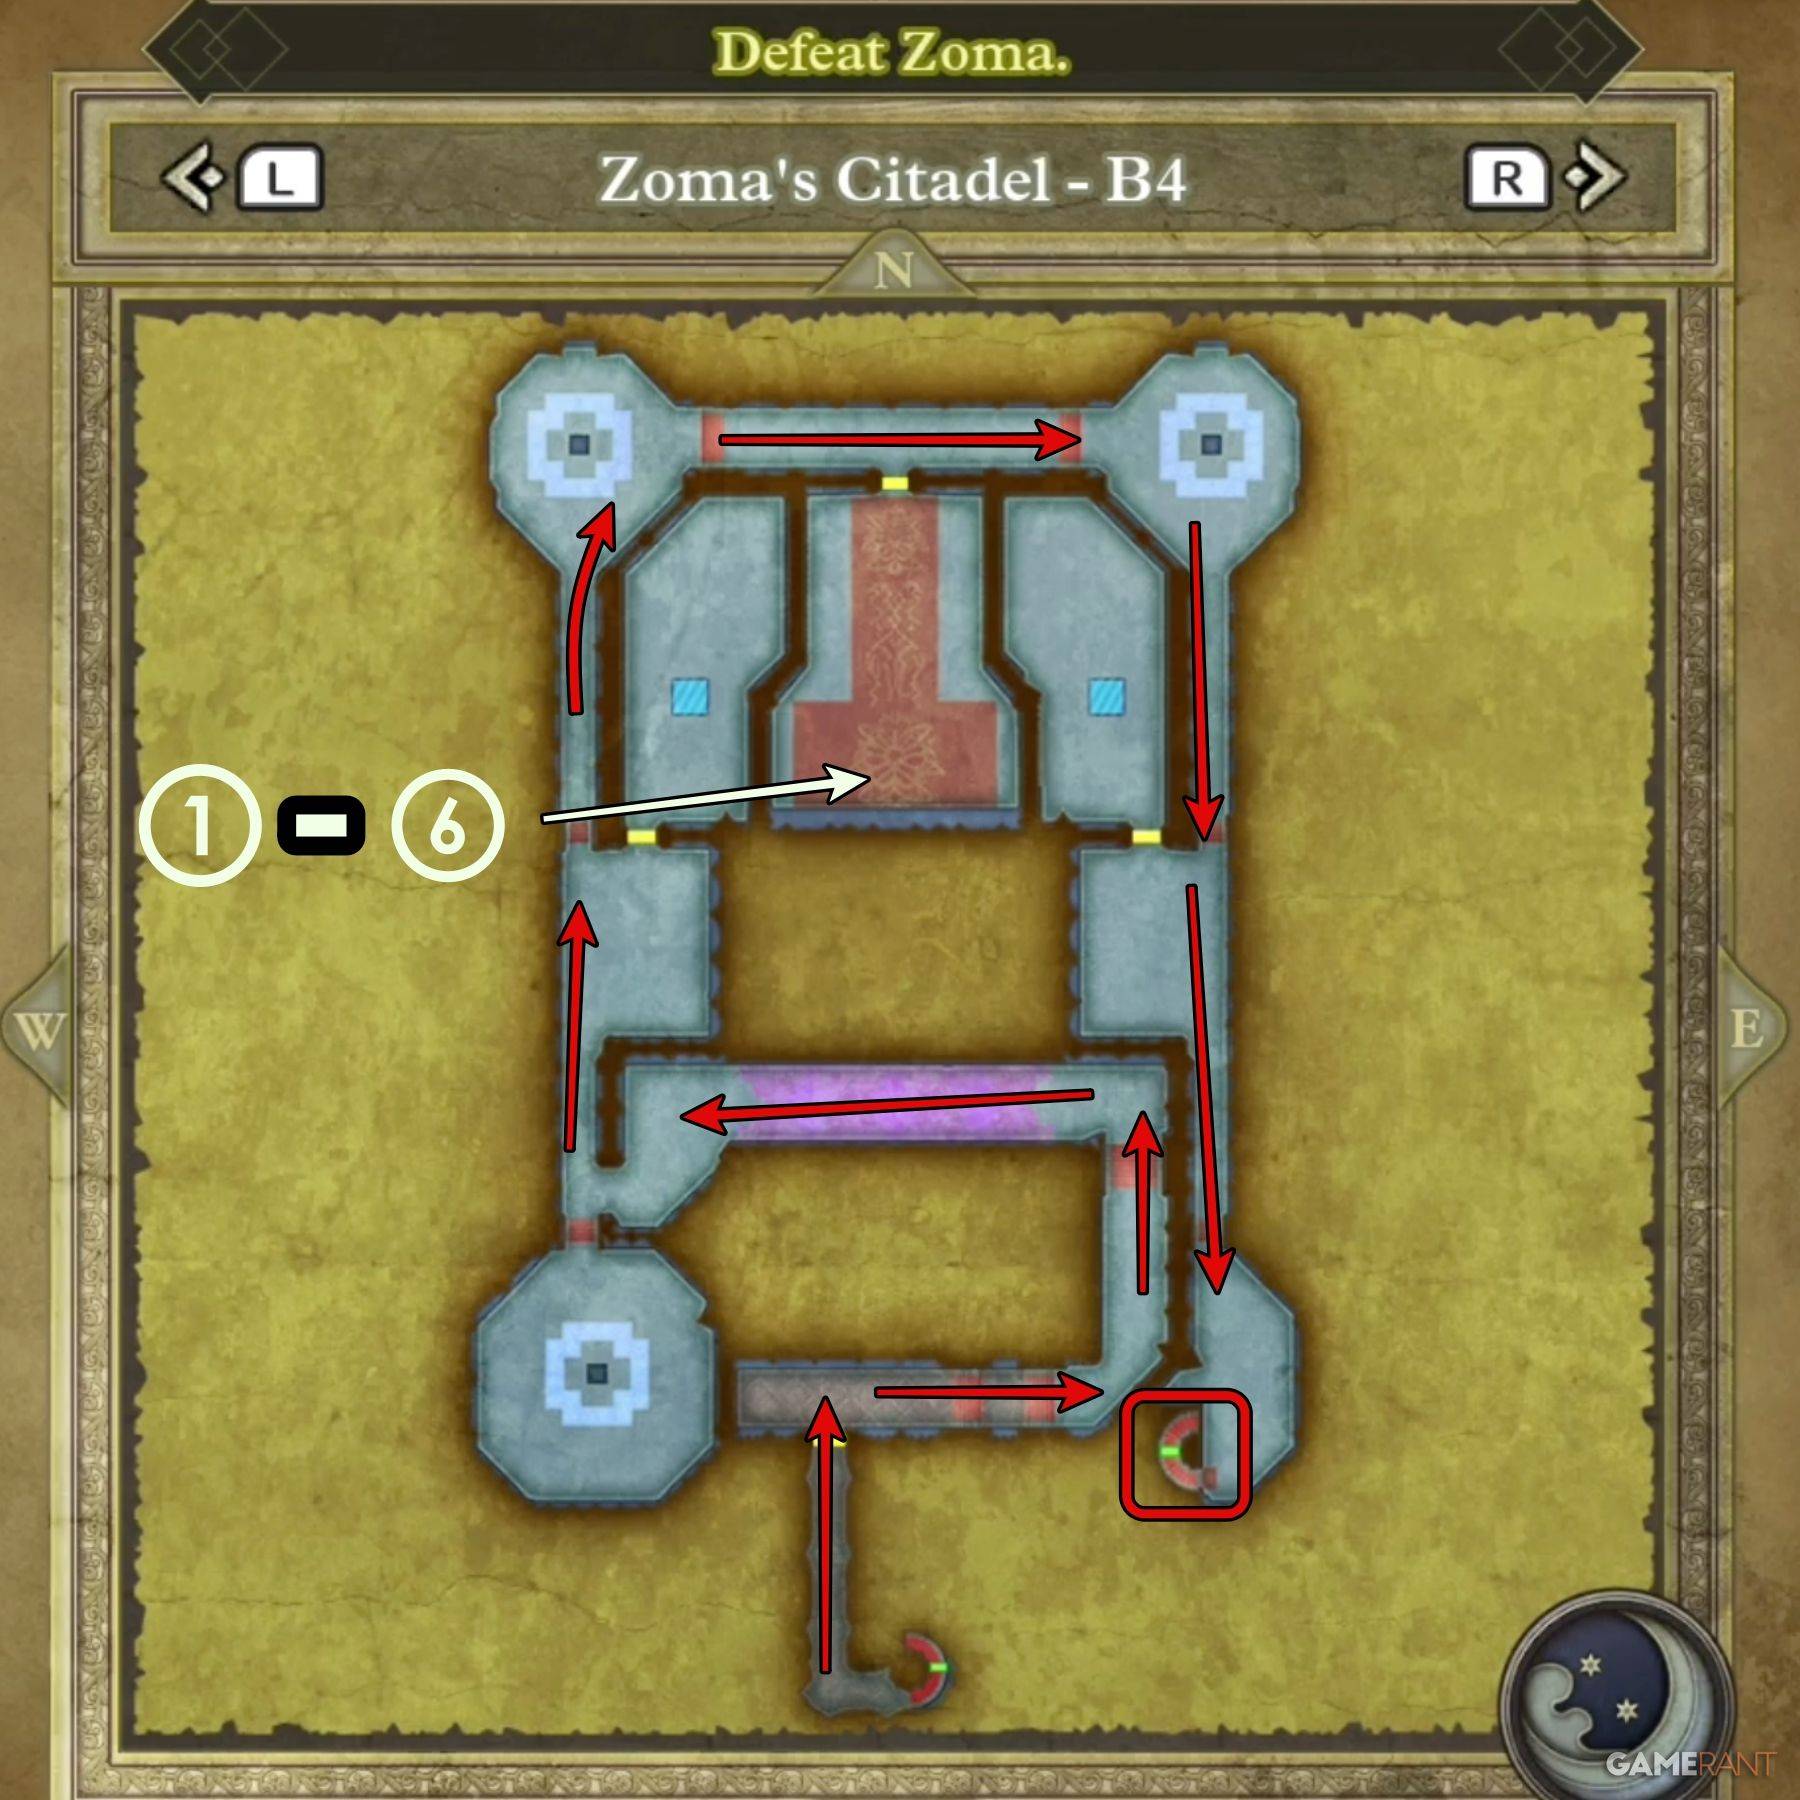
Navigate to the southeastern corner to reach Zoma. Watch the cutscene upon entering.
Treasure (six chests in one chamber):
- Shimmering Dress
- Prayer Ring
- Sage's Stone
- Yggdrasil Leaf
- Dieamend
- Mini Medal
Defeating Zoma's Minions and Zoma Himself
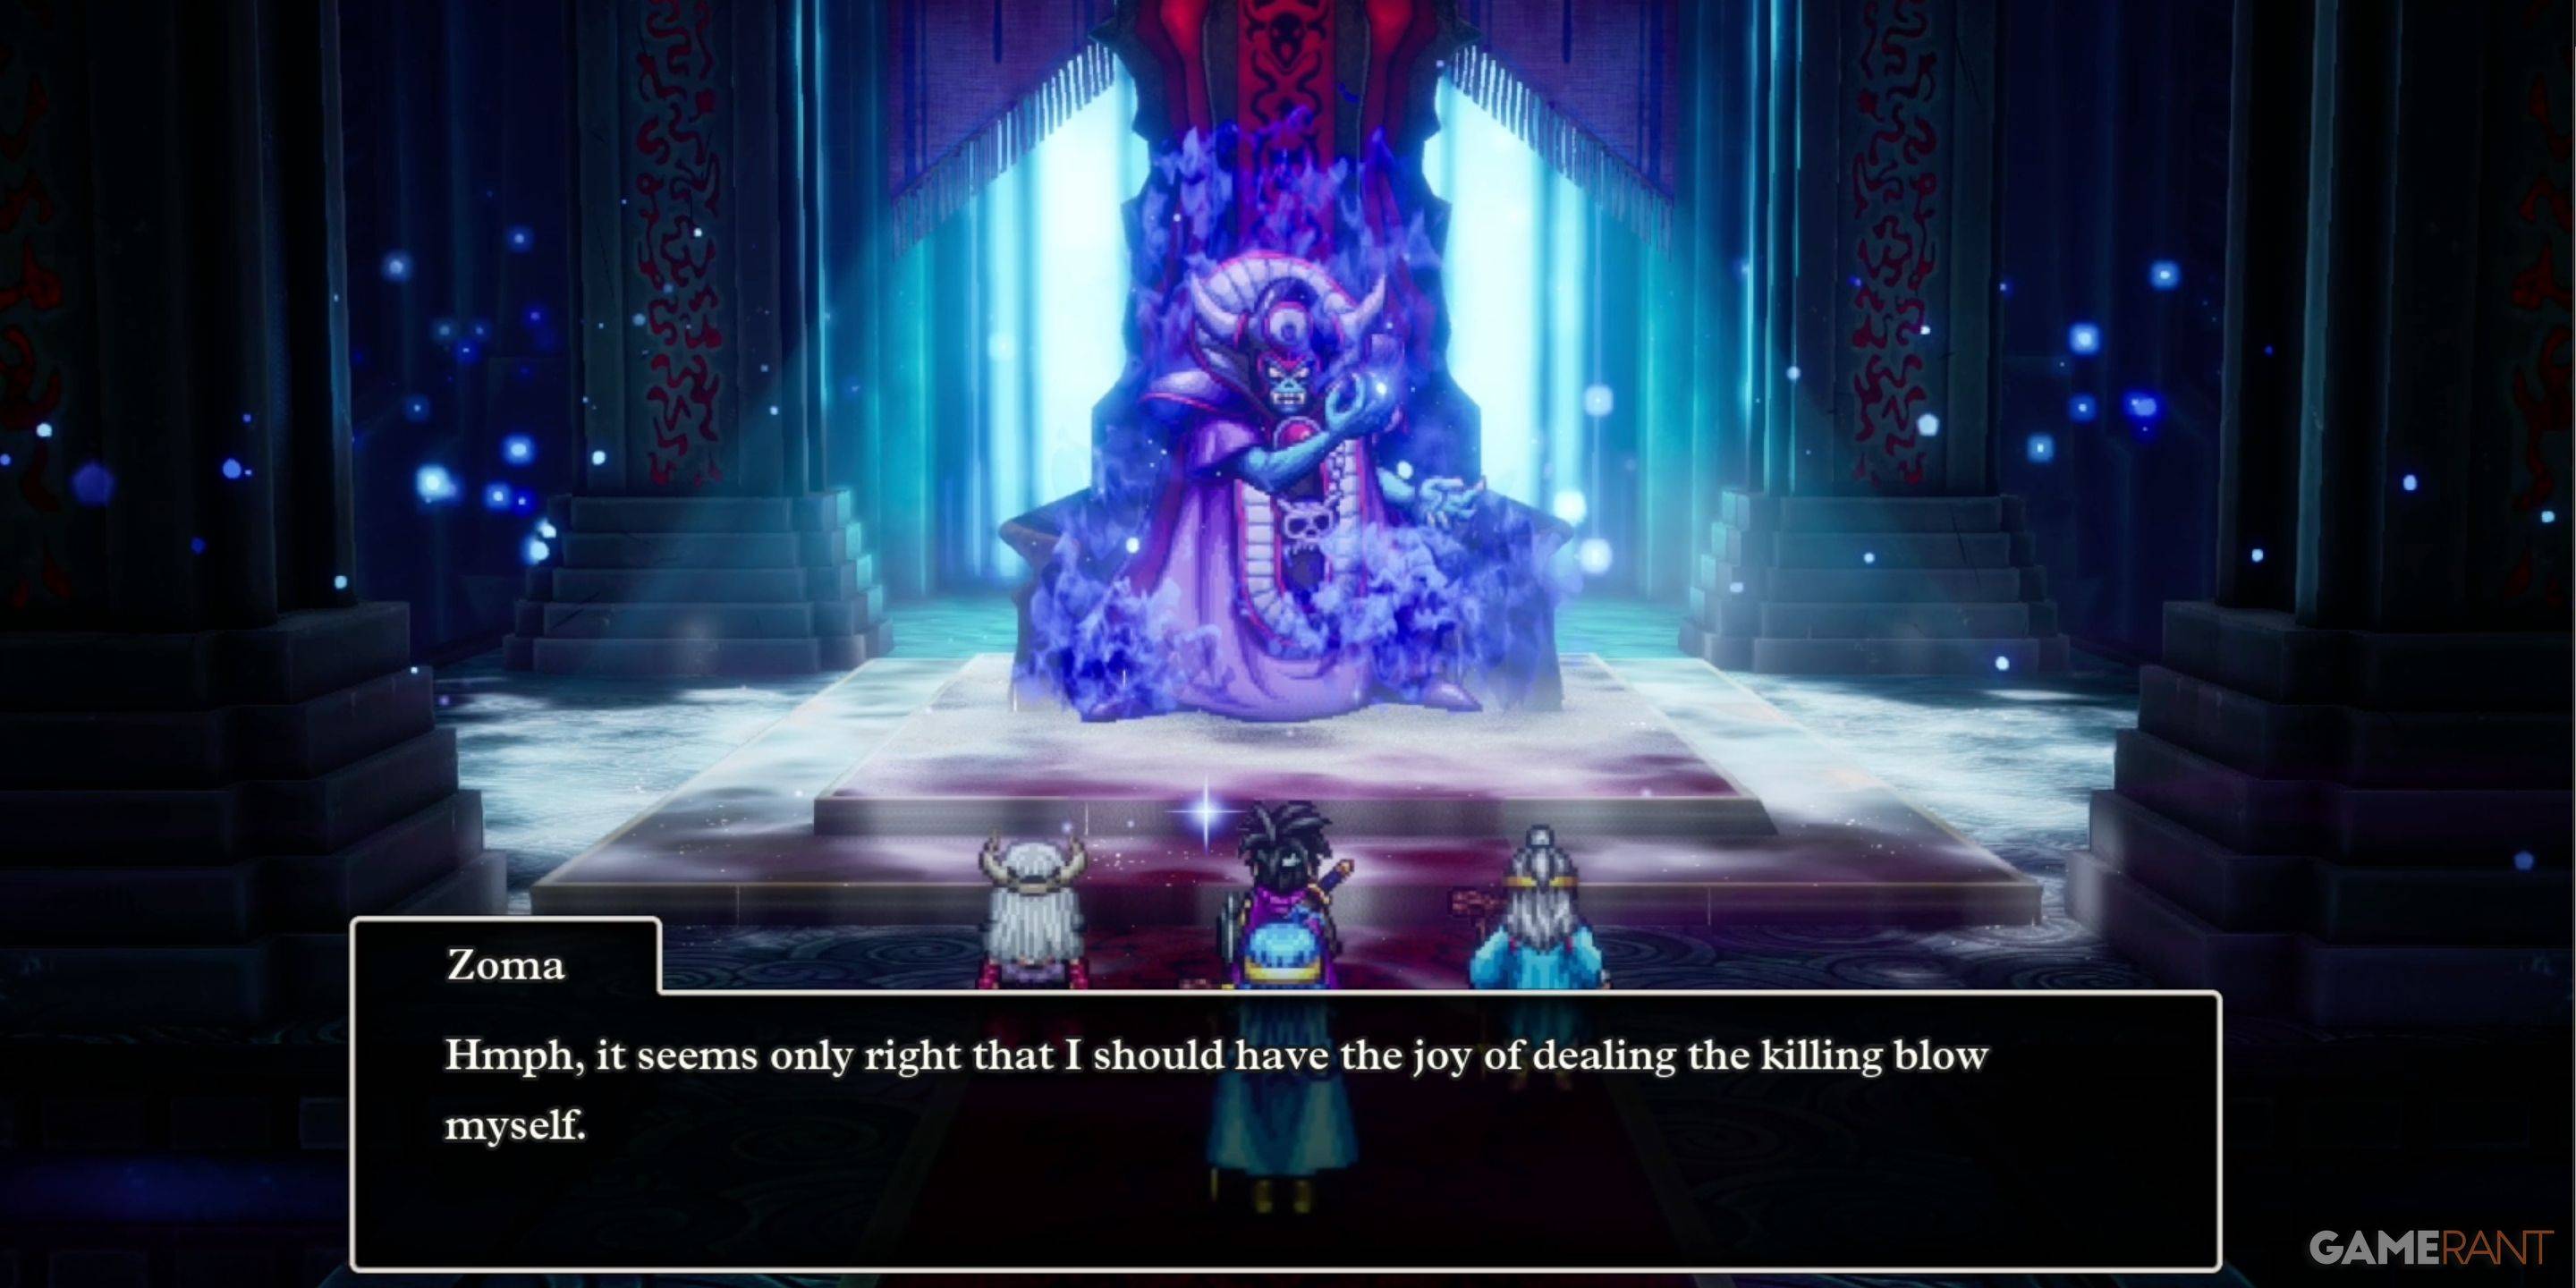
Before facing Zoma, you'll battle:
- King Hydra: Vulnerable to Kazap. Aggressive tactics are recommended due to its healing abilities.
- Soul of Baramos: Weak to Zap. Utilize strategies from the Tower of Rubiss encounter.
- Bones of Baramos: Similar weaknesses to the Soul of Baramos. Expect stronger attacks.
The Zoma battle is strategic. Initially, conserve MP; Zoma has a magic barrier. Wait for the prompt to use the Sphere of Light to remove the barrier, then unleash powerful Zap attacks (Kazap is highly effective). Prioritize HP management and utilize revives as needed. Buffs and debuffs, as well as damage-reflecting equipment, can be beneficial.
Monster List
| Monster Name | Weakness |
|---|---|
| Dragon Zombie | None |
| Franticore | None |
| Great Troll | Zap |
| Green Dragon | None |
| Hocus-Poker | None |
| Hydra | None |
| Infernal Serpent | None |
| One-Man Army | Zap |
| Soaring Scourger | Zap |
| Troobloovoodoo | Zap |
This comprehensive guide should equip you to successfully navigate Zoma's Citadel and defeat Zoma in Dragon Quest 3 Remake. Remember to adapt strategies based on your party composition and equipment.