Quick Links
After gathering the Six Orbs and hatching Ramia the Everbird, you're ready to venture into Baramos's Lair in Dragon Quest 3 Remake. This dungeon serves as the pinnacle of your journey so far, challenging your skills before you delve into the dark world beneath the main map. In this comprehensive guide, we'll walk you through how to locate and conquer Baramos's Lair in Dragon Quest III HD-2D Remake.
Baramos's Lair is the stronghold of the Archfiend Baramos, the main antagonist throughout the first half of Dragon Quest 3 Remake. Access to this dungeon is granted only after unlocking Ramia the Everbird, which transports you to the surrounding valley. It's advisable for your Hero to reach at least level 20 before tackling this challenge. Inside Baramos's Lair, you'll encounter several crucial items, which we will detail in the relevant sections.
How to Reach Baramos's Lair in Dragon Quest 3 Remake
 Once you've completed the Maw of the Necrogond and secured the Silver Orb, you can unlock the Everbird. To reach Baramos's Lair, you have the option to fly directly from either the Shrine of the Everbird or the Necrogond Shrine.
Just north of the Necrogond Shrine lies an island encircled by mountains, home to Baramos's Lair. Fly Ramia to this location and disembark near the dungeon's entrance. Simply proceed north and enter the dungeon as you would a town.
Baramos's Lair Walkthrough – Dragon Quest 3 Remake
Upon entering Baramos's Lair in DQ3 Remake, you'll notice it differs from most dungeons. Instead of navigating up or down within a single structure, you'll weave through both indoor and outdoor areas, ultimately aiming to confront the Archfiend Baramos.
Your initial entry leads to Baramos's Lair – Surroundings, the primary outdoor hub where you'll return after exiting any structure or passageway. We'll outline the main path to the boss fight chamber and then detail the treasures found on each floor separately.
How to Reach Baramos Boss Fight – Main Path:
- Step 1: Start from the entrance of Baramos's Lair. Instead of entering the main door to the 'Entrance' area, move eastward towards the pool of water in the northeast corner.
- Step 2: At the stairs leading to the pool, turn left and head west to another set of stairs. Ascend these stairs and enter the door on your right.
- Step 3: Inside the Eastern Tower, ascend to the top and exit.
- Step 4: You'll find yourself on the castle roof, visible on the Surroundings map. Head southwest across the roof, then descend the stairs to the lower level. Continue west, navigate through the double wall gaps on the northwest roof, and use the northwest corner stairs.
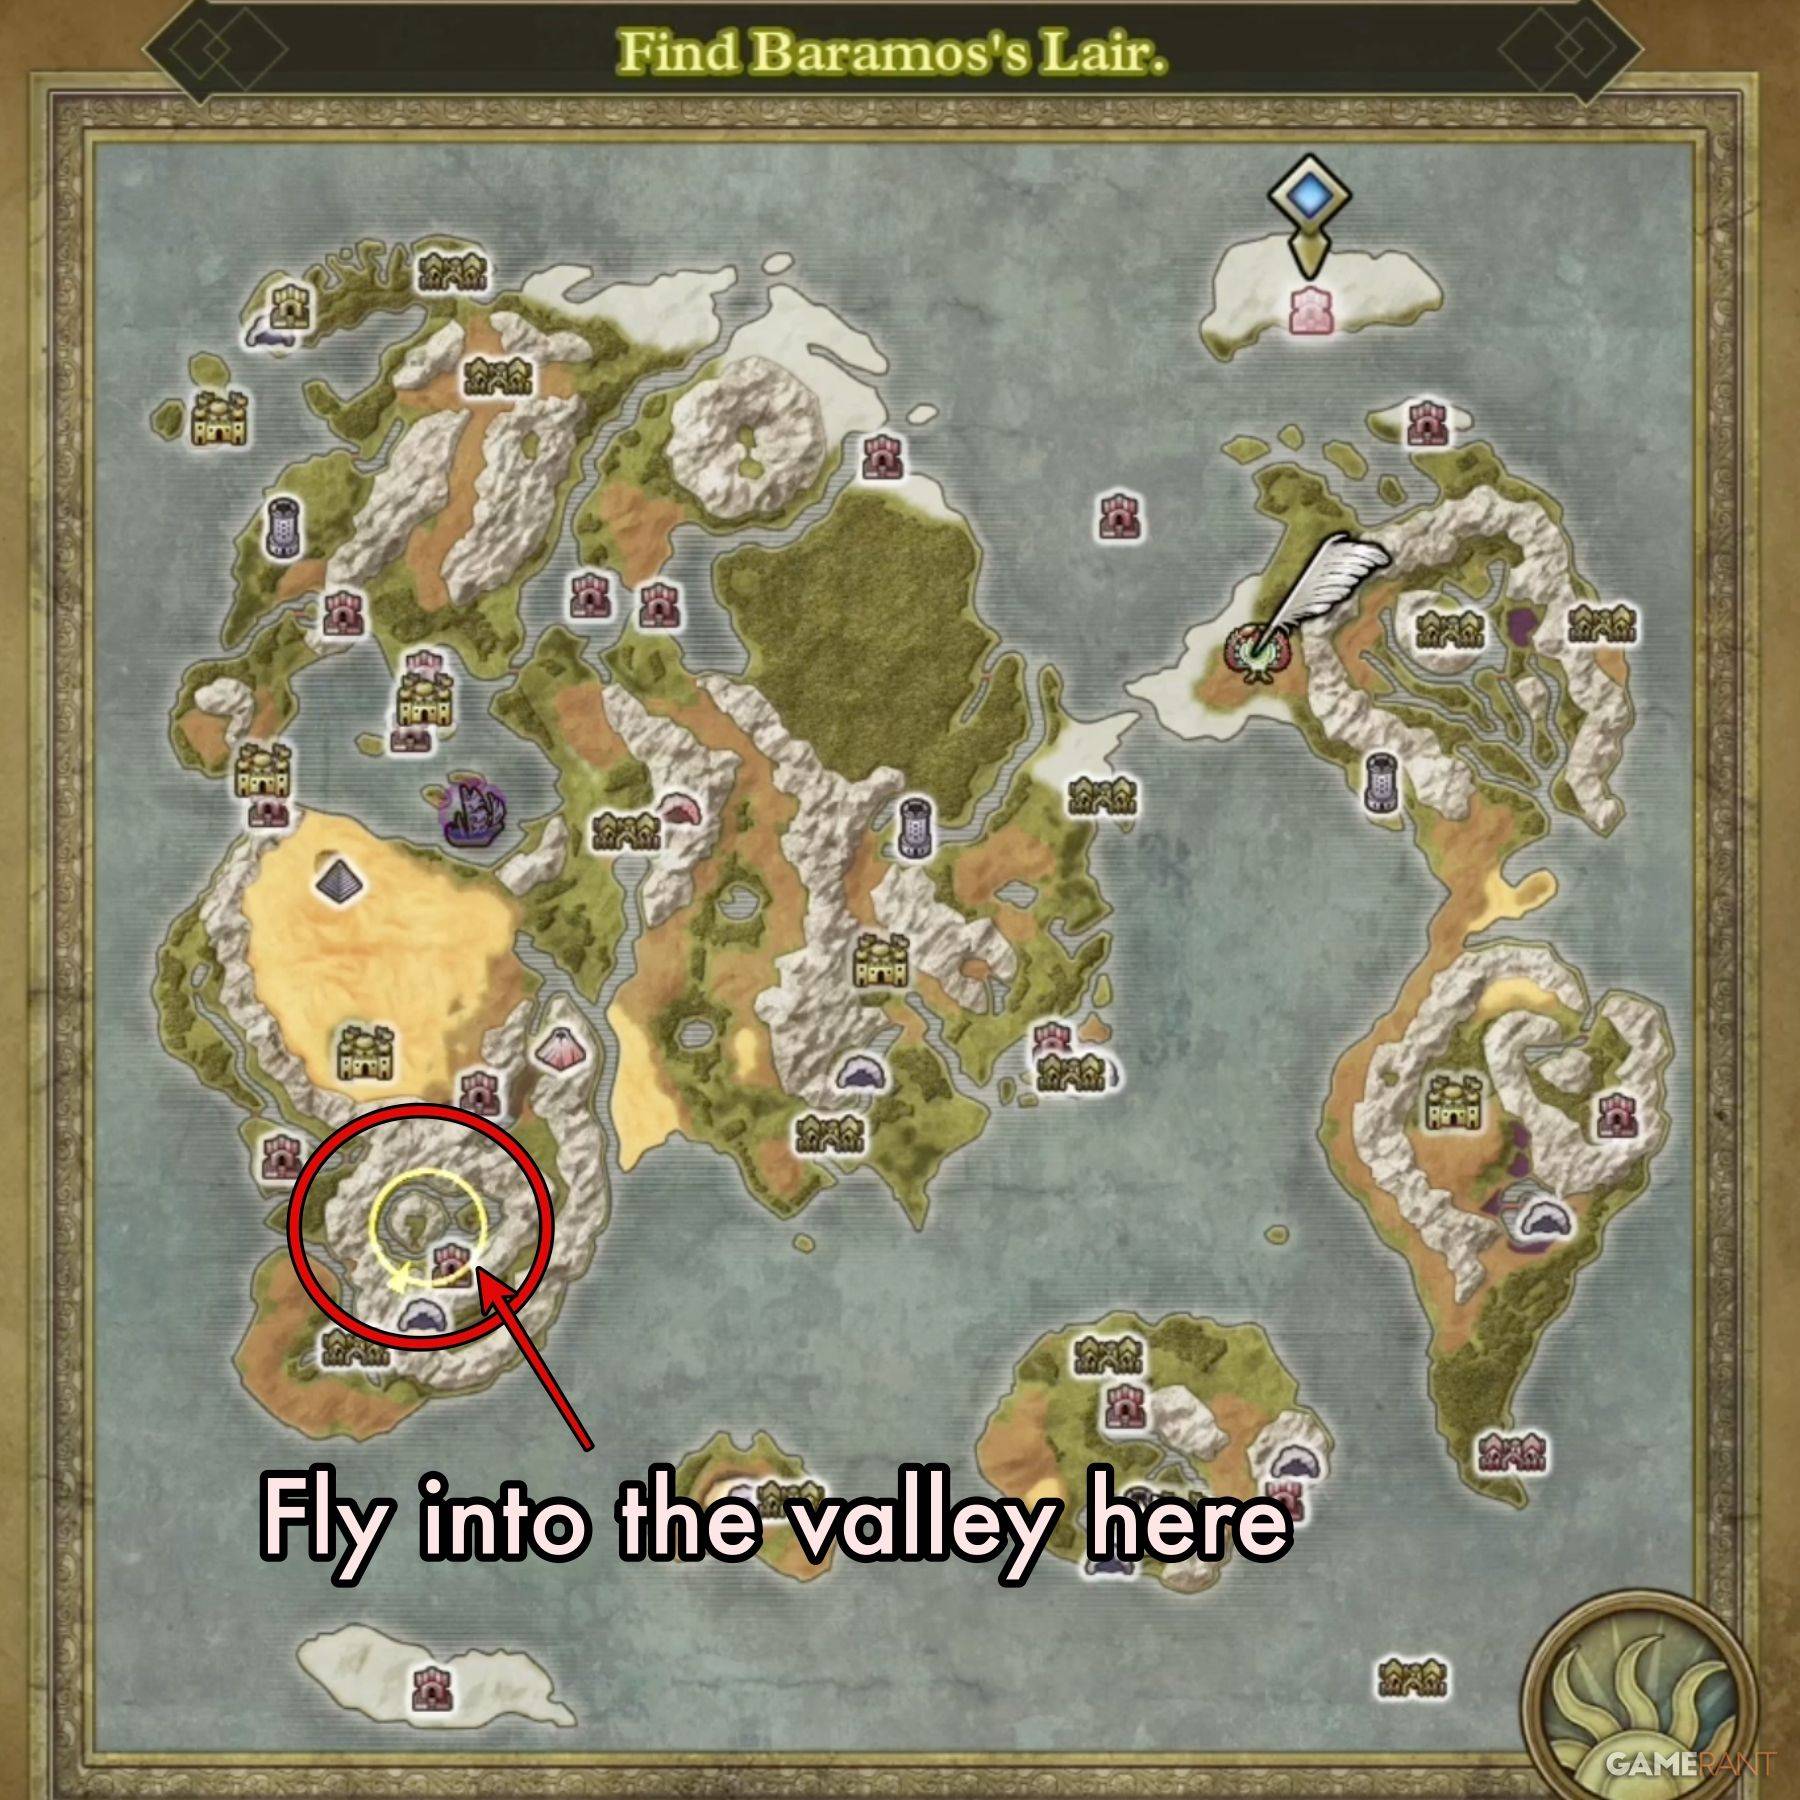
- Step 5: The northwest stairs lead to the Central Tower. Use the Safe Passage spell to cross the electrified floor panels and descend the southwest corner stairs to B1 Passageway A.
- Step 6: In B1 Passageway A, turn east instead of south, and proceed to the far eastern stairs.
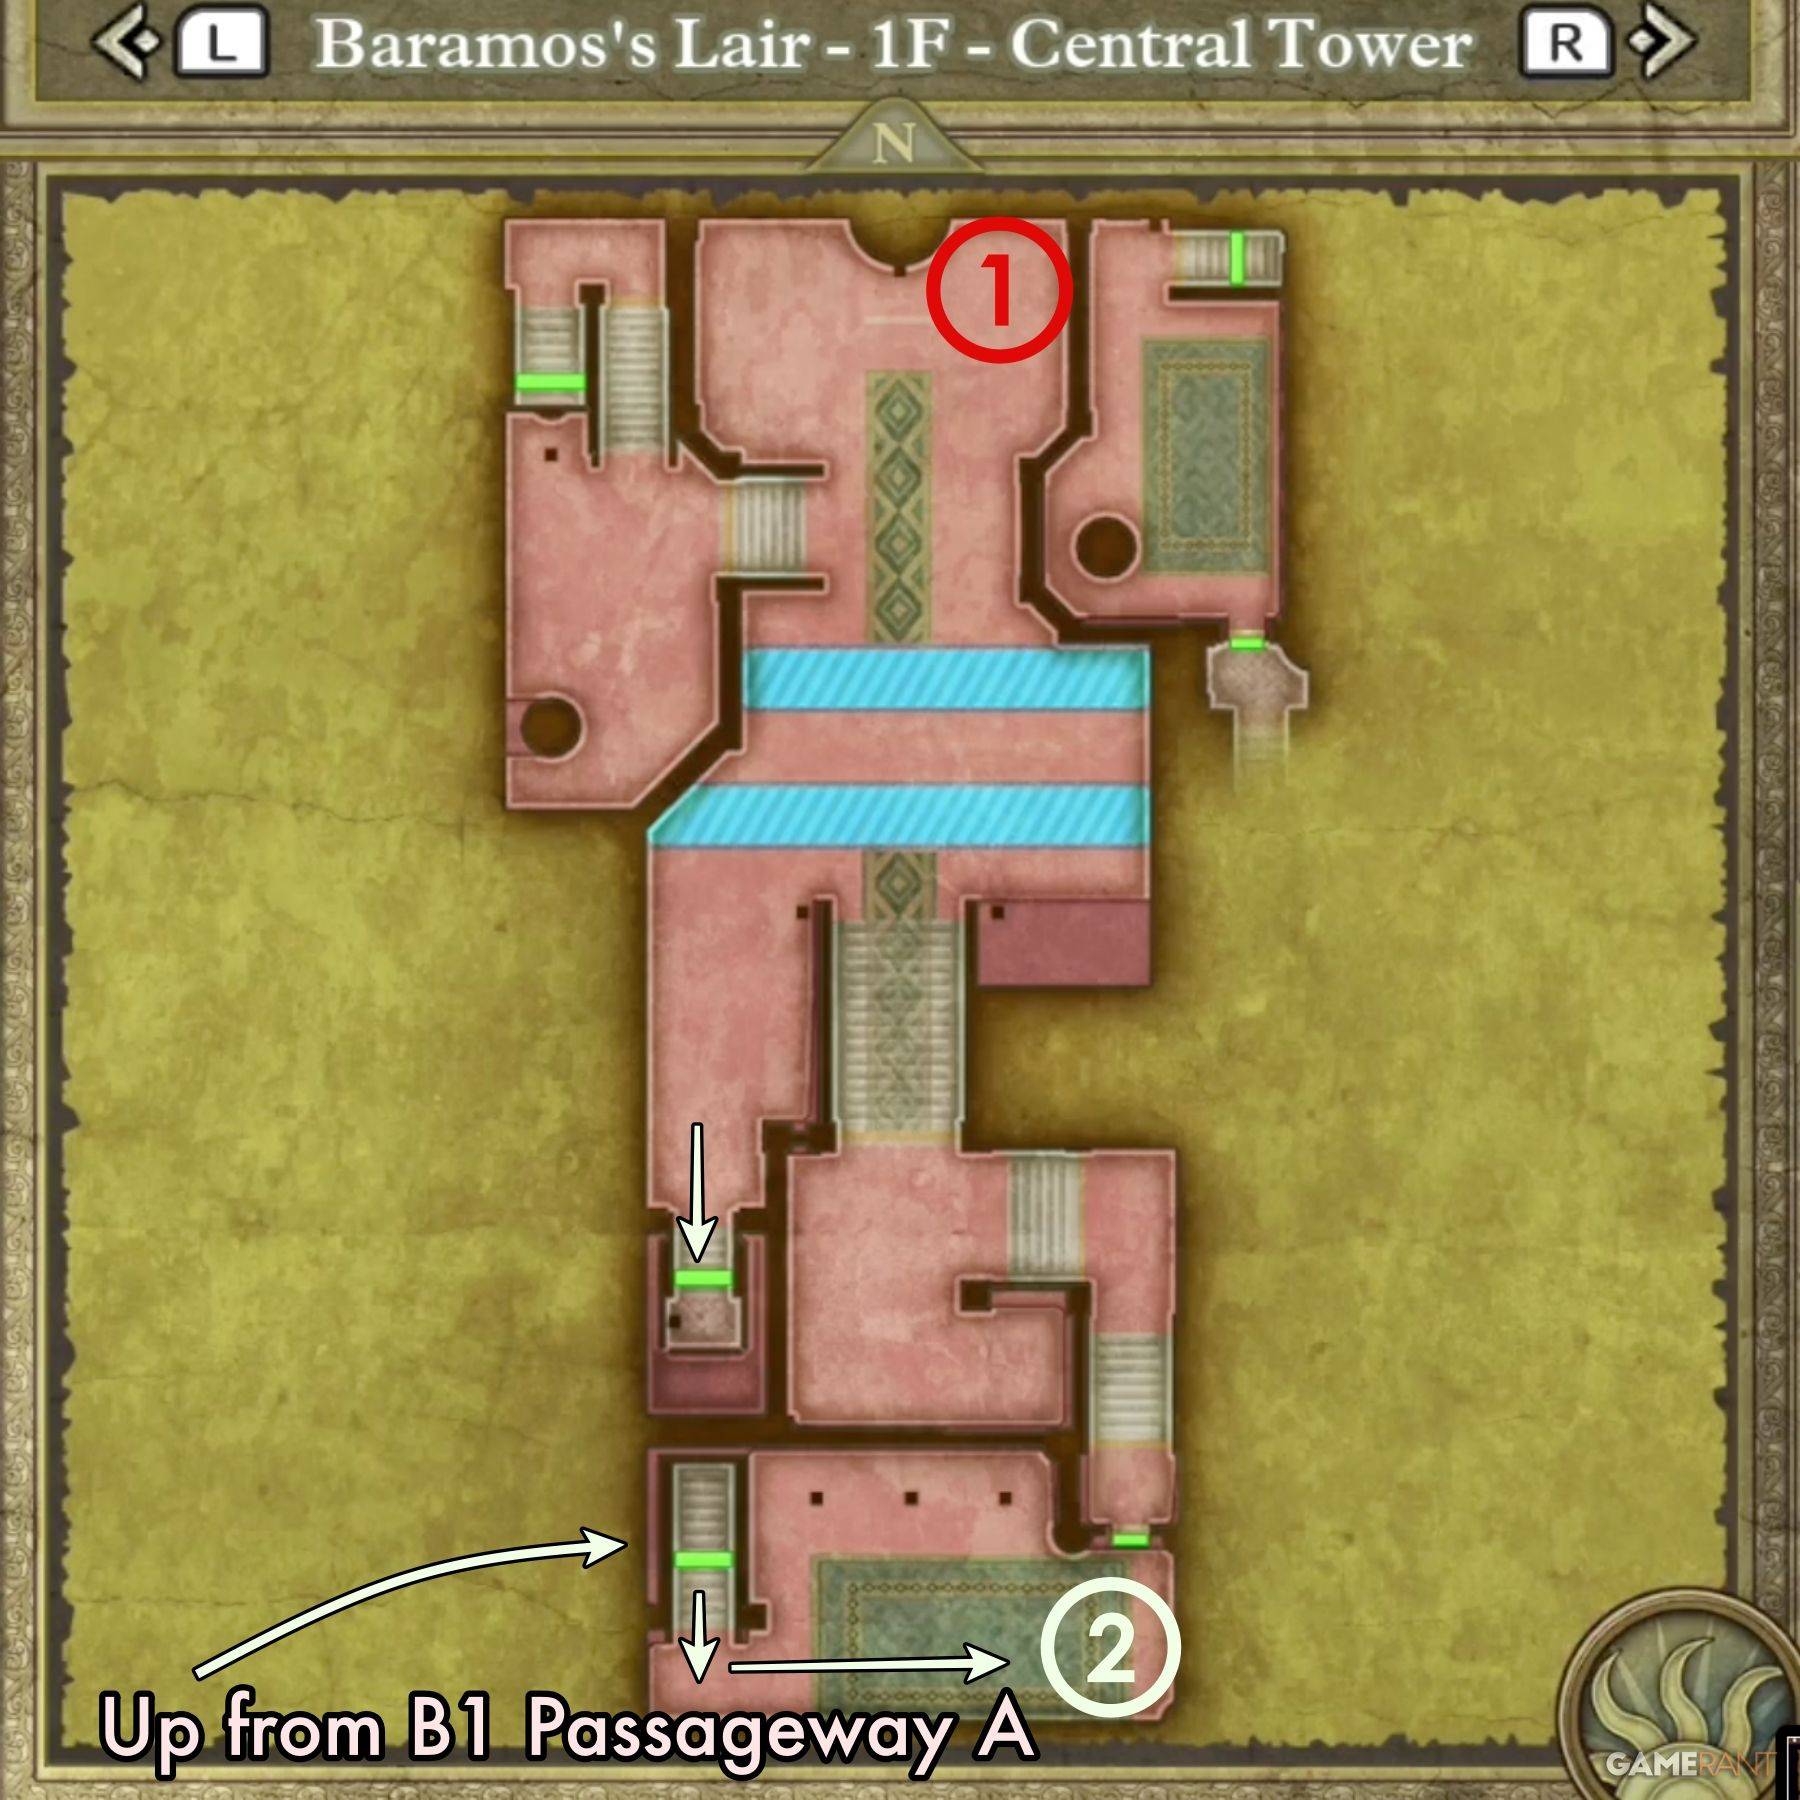
- Step 7: Enter the South-East Tower from the southeast. Climb the northeast stairs to the roof, head west briefly, then descend another set of stairs to the western section. Cross the grass northwest and enter the available door.
- Step 8: This door leads to the northeast corner of the Central Tower. Exit through the only available door.
- Step 9: You'll enter B1 Passageway B, a long corridor with a single entrance and exit. Head north to the stairs.
- Step 10: Enter the Throne Room and exit via the southern edge, avoiding the floor panels.
- Step 11: Back on the Surroundings map, leave the Throne Room in the northwest corner and head east to the structure on the lake's island in the northeast corner. This is Baramos's Den, where the boss fight awaits.
All Treasure in Baramos's Lair – Dragon Quest 3 Remake
All Surroundings Treasure:
 - Treasure 1 (Chest): Prayer Ring
- Treasure 2 (Buried): Flowing Dress
The Surroundings map features one of Dragon Quest III Remake's Friendly Monsters, an Armful named Armstrong for us.
All Central Tower Treasure:
 - Treasure 1: Mimic (enemy)
- Treasure 2: Dragon Mail
All South-East Tower Treasure:
 - Treasure 1 (Chest): Hapless Helm
- Treasure 2 (Chest): Sage's Elixir
- Treasure 3 (Chest): Headsman's Axe
- Treasure 4 (Chest): Zombiesbane
To access the three Treasure Chests in the southeast section of the South-East Tower, reach the Central Tower first (refer to the main path steps). Exit through the southeast door, cross the roof eastward, descend the stairs, and you'll reach the platform with the chests.
All B1 Passageway Treasure:
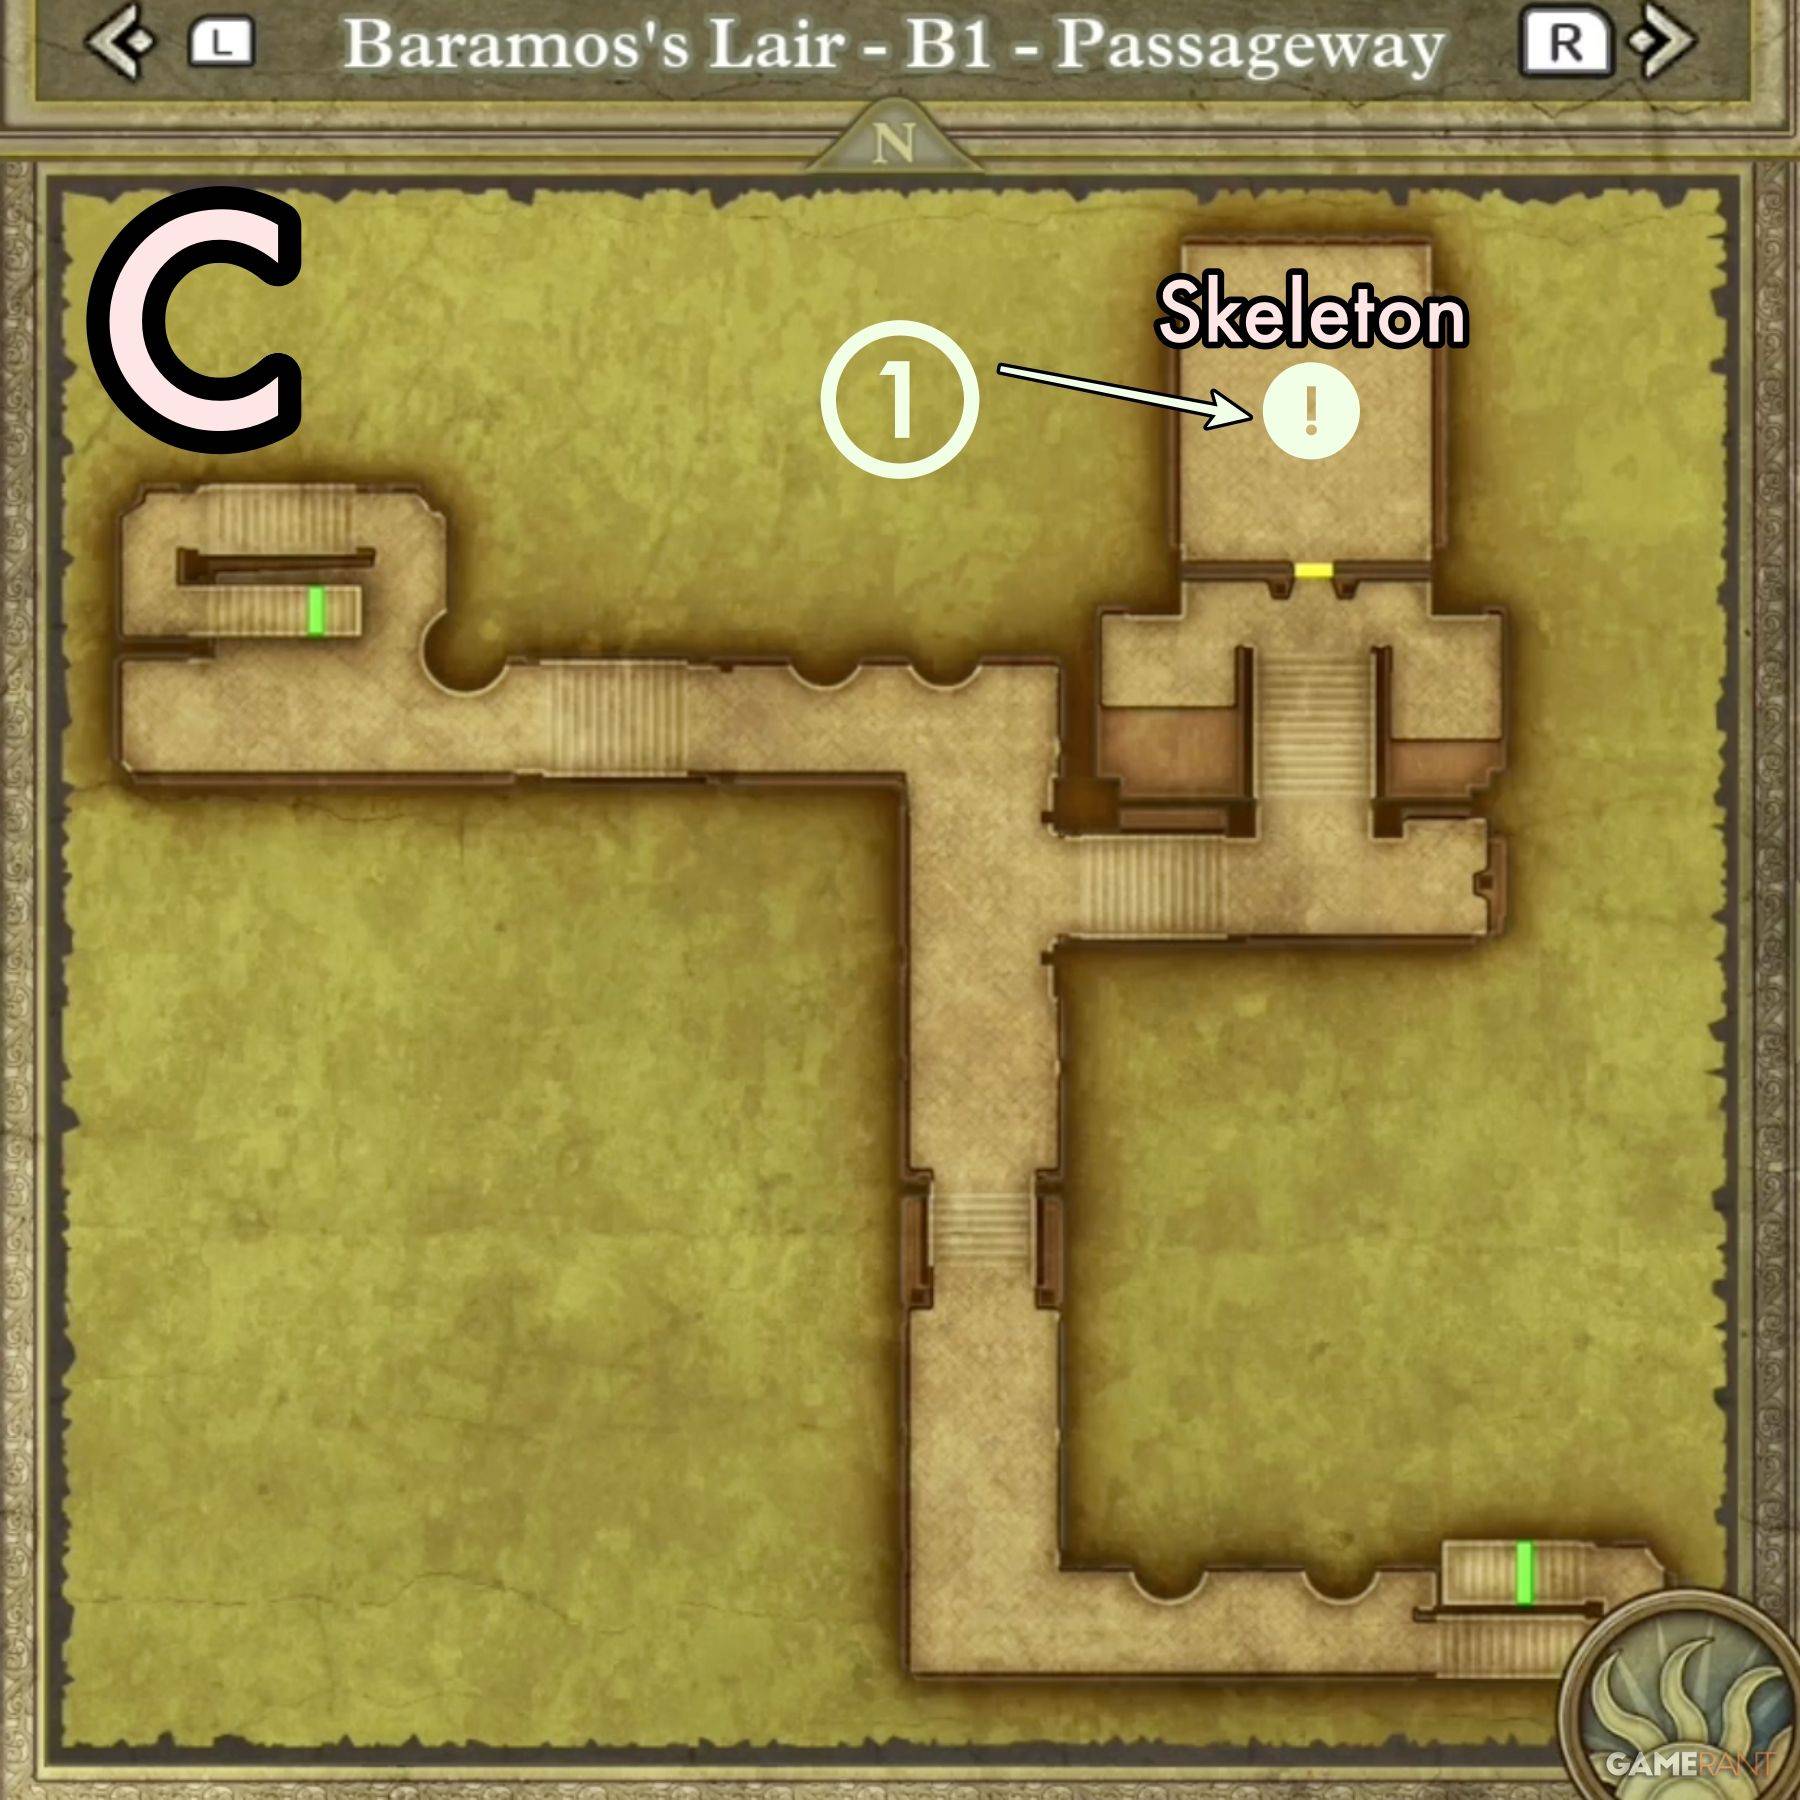 - Treasure 1 (Buried): Mini Medal (On left side of skeleton)
To reach this area, head to the northern section of the Entrance map. Descend the western staircase to B1 Passageway C.
All Throne Room Treasure:
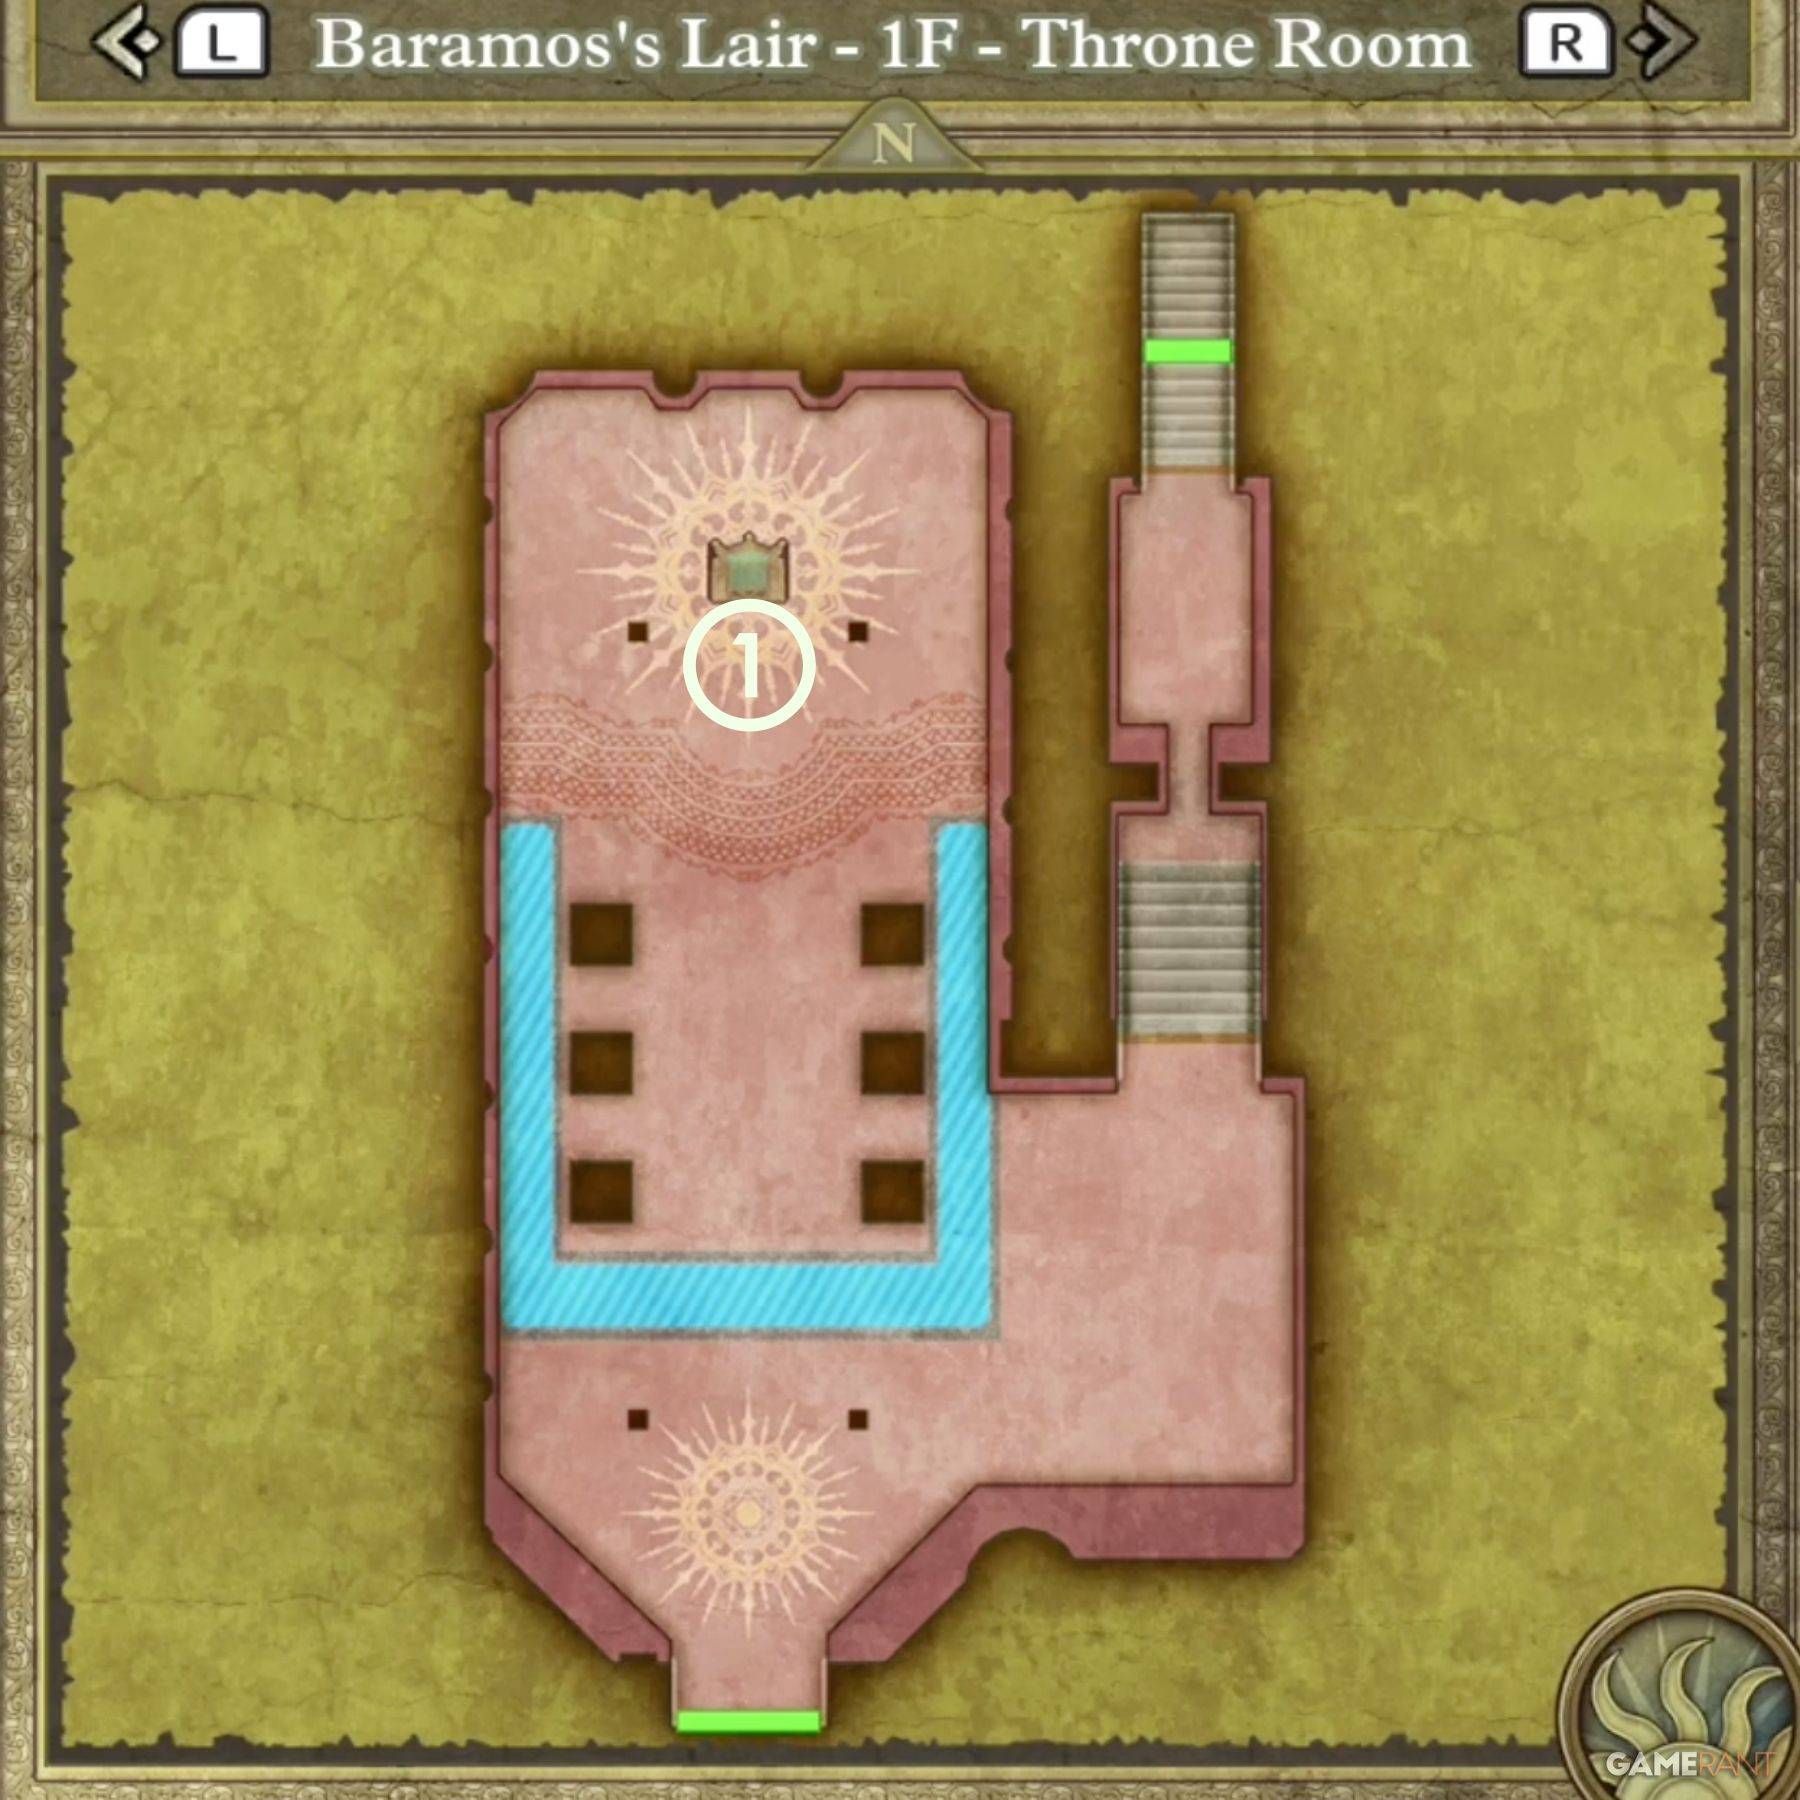 - Treasure 1 (Buried): Mini Medal (in front of throne)
How to Defeat Baramos – Dragon Quest 3 Remake
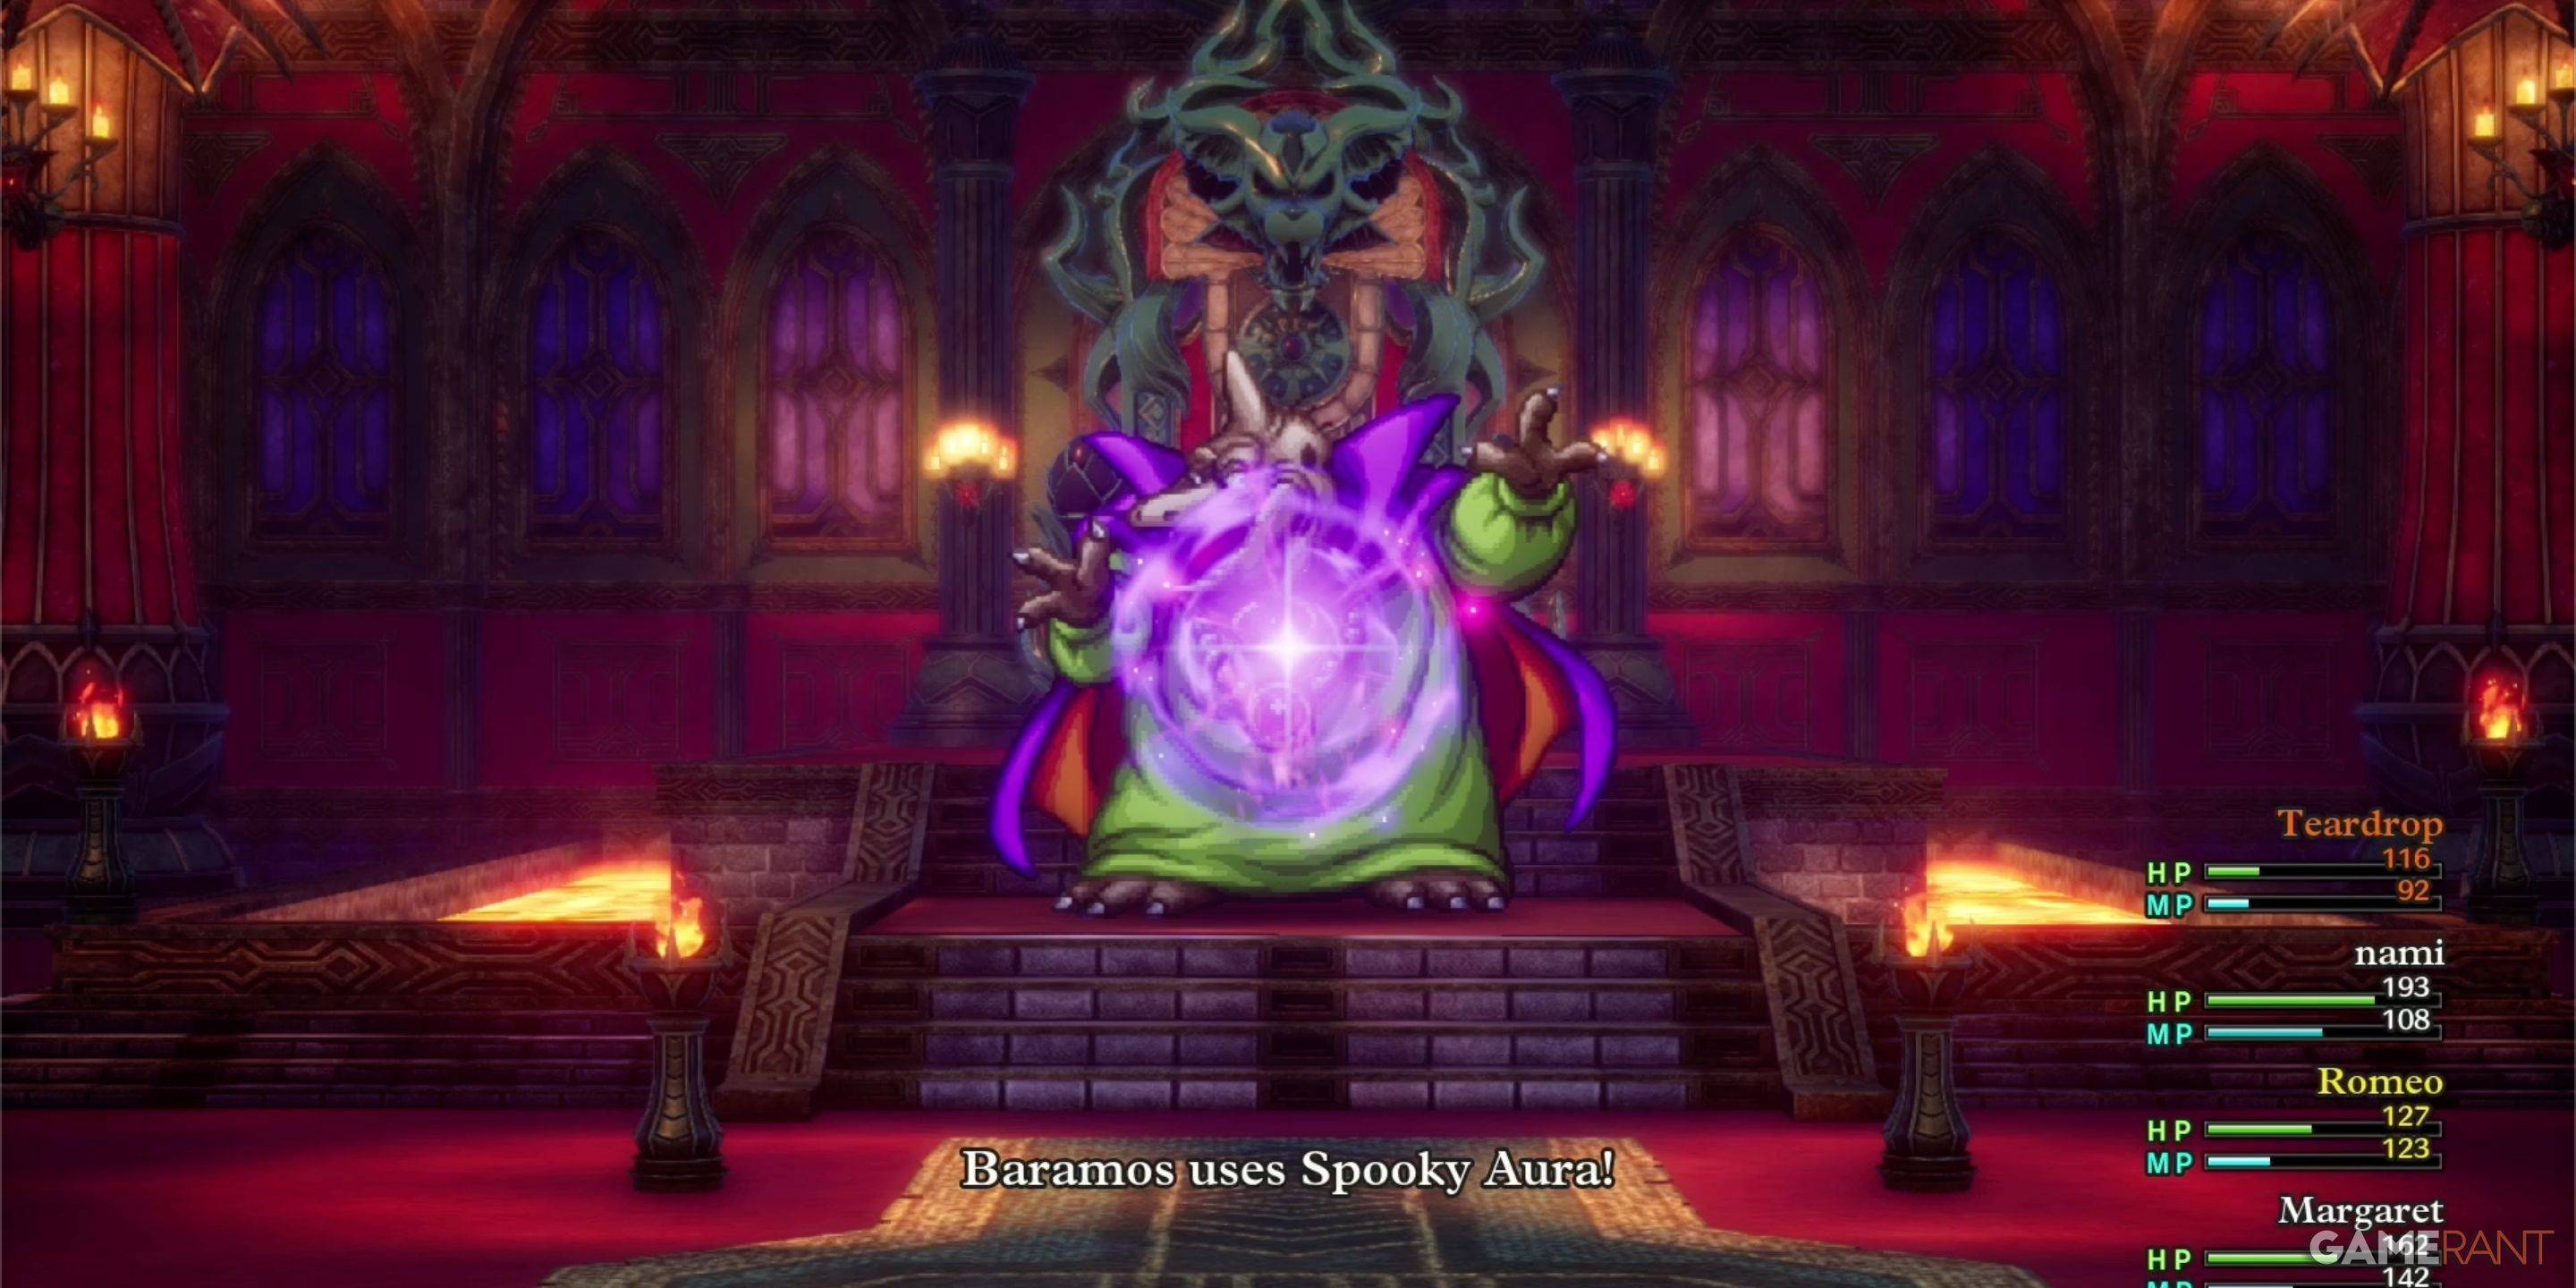 Your initial encounter with Baramos in DQIII Remake will likely be the toughest battle you've faced. To triumph, ensure you're well-prepared with a solid strategy and appropriate leveling.
What is Baramos Weak to in Dragon Quest 3 Remake?
Understanding Baramos's weaknesses is crucial for your strategy. Baramos is vulnerable to:
- Crack (All ice-based spells)
- Woosh (All wind-based spells)
Unlike many bosses, Baramos isn't weak to Zap in any form. At this stage, you should have access to higher-level spells like Kacrack and Swoosh, which the Hero cannot cast. Opt for the Hero to focus on healing while two spell casters handle offense, or use Gust Slash.
Maintain at least one dedicated healer throughout the battle. Even when adequately leveled, Baramos can swiftly decimate your party. Prioritize consistent healing over a quick victory, as survival is key.
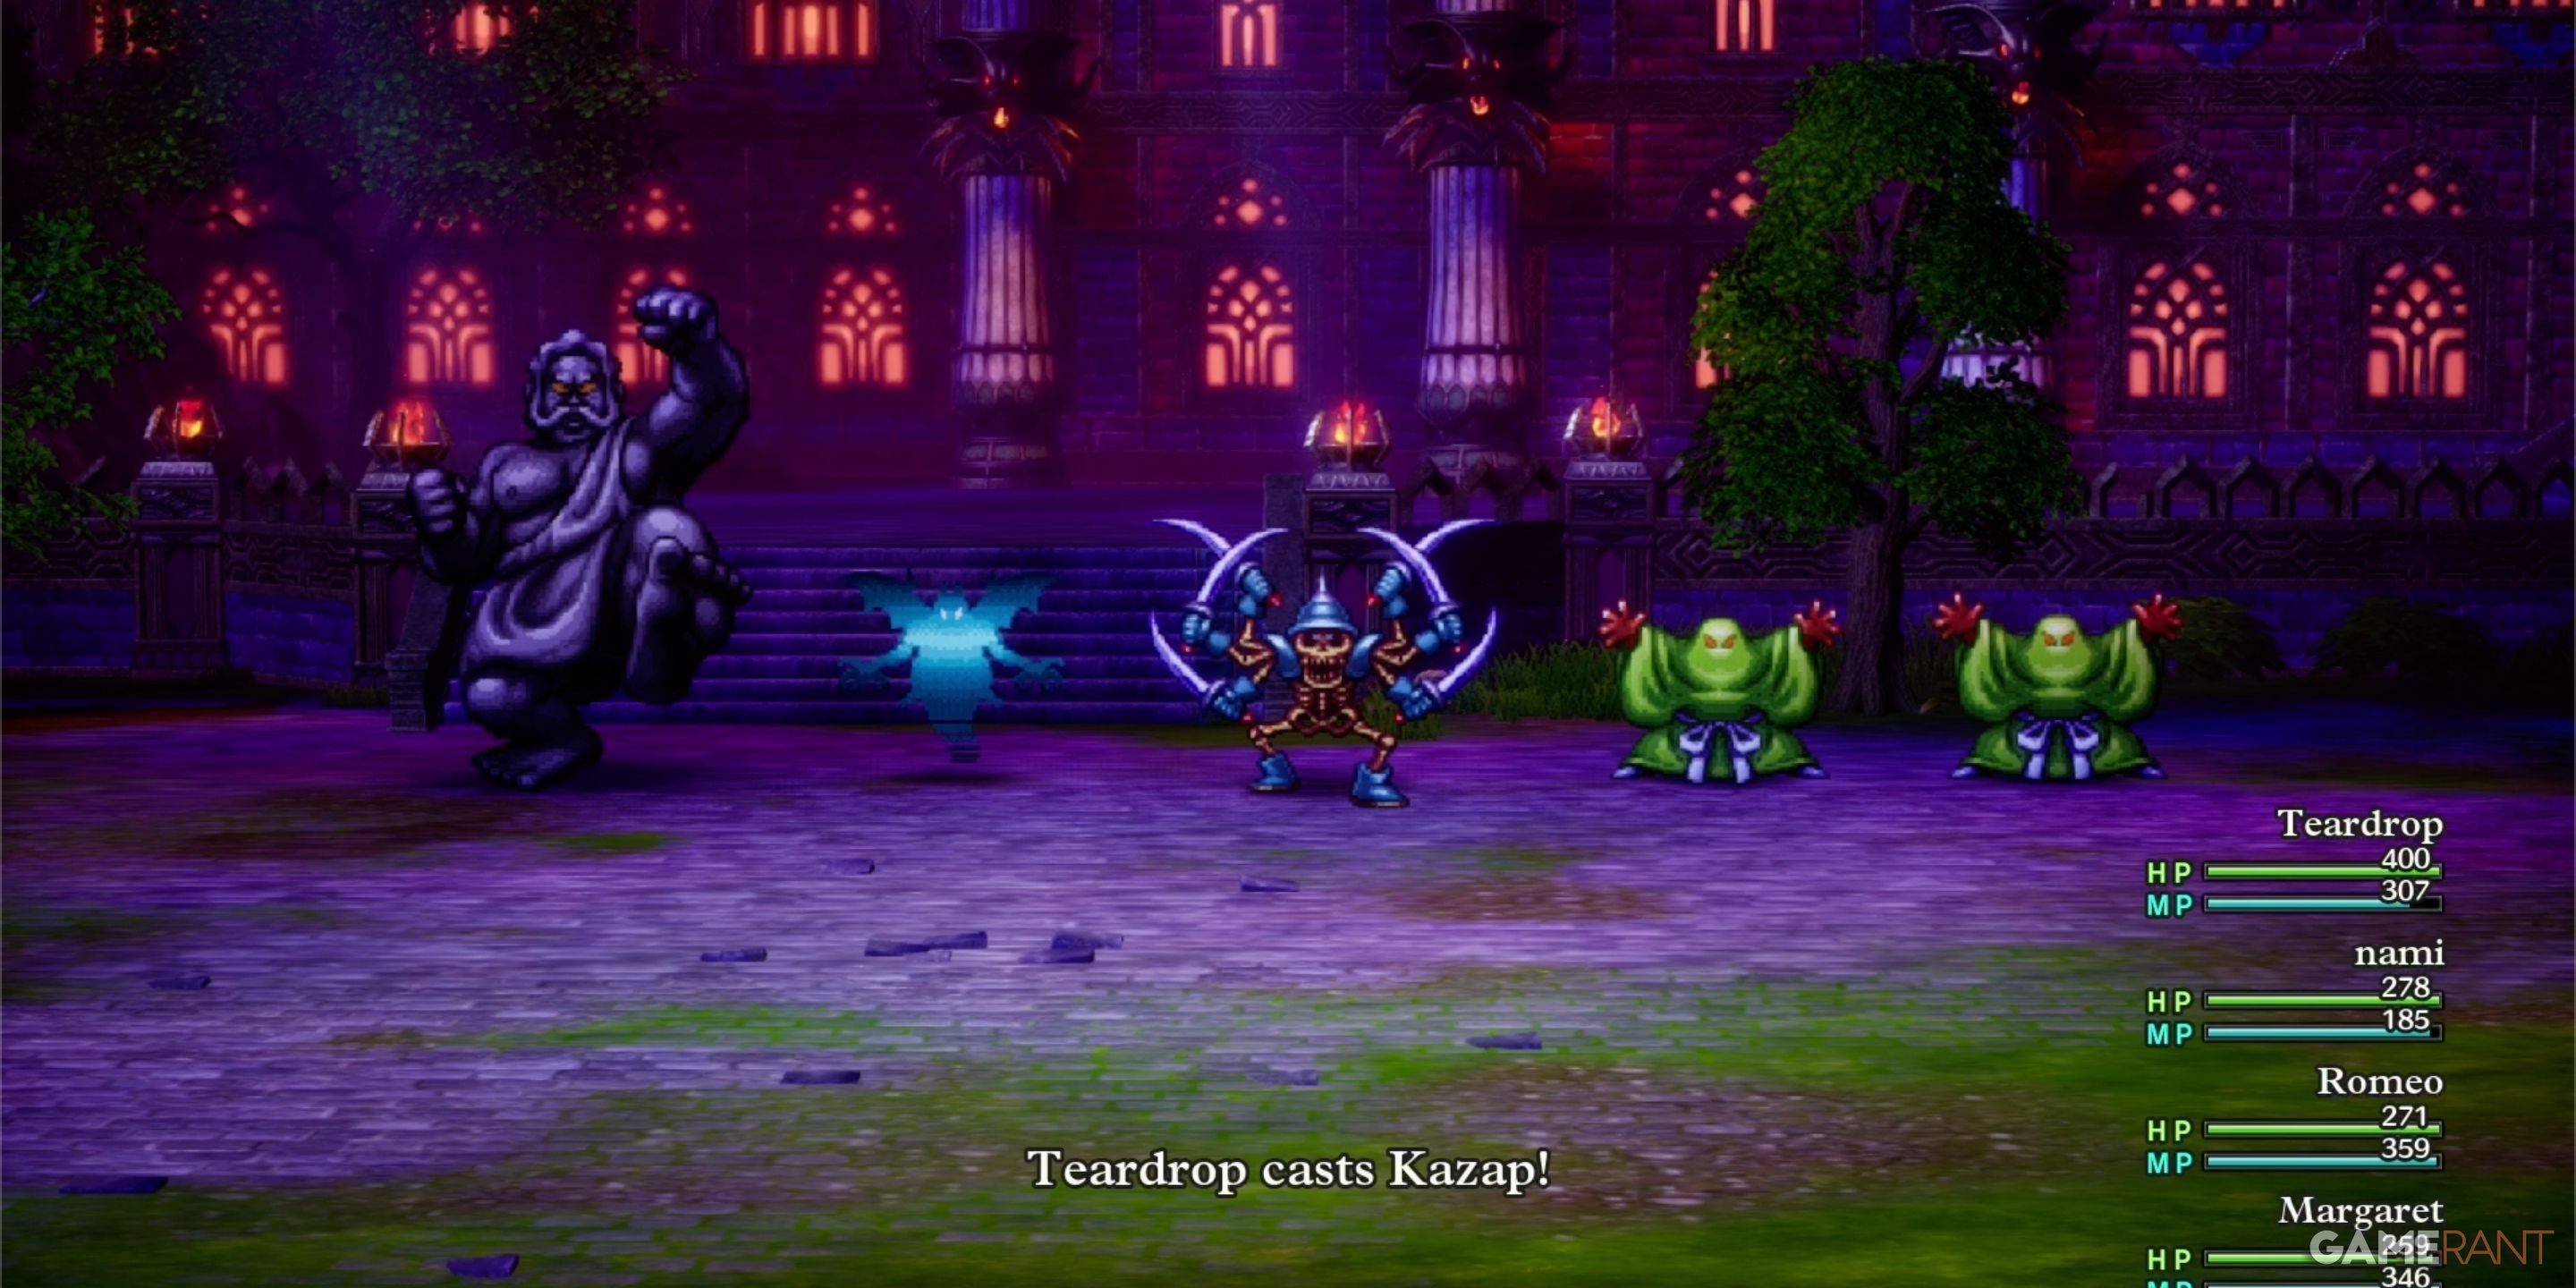
Every Monster in Baramos's Lair – Dragon Quest 3 Remake
| Monster Name | Weakness |
|---|---|
| Armful | Zap |
| Boreal Serpent | TBD |
| Infanticore | TBD |
| Leger-De-Man | TBD |
| Living Statue | None |
| Liquid Metal Slime | None |
| Silhouette | Varies (Each is different) |